
Creating a stylish and inviting home doesn’t have to come with a hefty price tag. That’s why I put together this post about cardboard DIY wall art. It’s a fun, eco-friendly way to express your creativity while being kind to the planet. If you’ve been scouring the internet for fresh ideas to liven up your walls without breaking the bank, you’re in the right place.
This collection of 11 Cardboard DIY Wall Art Ideas is perfect for anyone looking to add a personal touch to their living spaces. Whether you’re a seasoned crafter or just starting with DIY home projects, these ideas will inspire you to turn everyday cardboard into stunning cardboard wall decor. You’ll discover how simple it is to create eye-catching pieces that not only look stylish but also reflect your unique personality.
By diving into this guide, you’ll gain access to practical tips and creative techniques for making beautiful upcycled wall art. You’ll learn how to transform simple cardboard into geometric wall paneling, nature-inspired cutouts, and much more. Get ready to impress your friends and family with your newfound crafting skills, while also enjoying the satisfaction of affordable home decor that’s sustainable and remarkably chic.
Key Takeaways
– Embrace Sustainability: Using cardboard for wall art is an eco-friendly choice that reduces waste while allowing creativity to flourish.
– Affordable Creativity: Cardboard is inexpensive and often readily available, making it a budget-friendly material for your DIY projects.
– Diverse Styles: From geometric patterns to nature-inspired designs, there are numerous ways to showcase your personal taste with cardboard wall decor.
– Simple Techniques: Many of the DIY projects are straightforward and require minimal materials, perfect for beginners or experienced crafters.
– Personalized Home Decor: Engage in creative expression as you make unique pieces of art that reflect your style and enhance your living space.
1. Geometric Wall Paneling
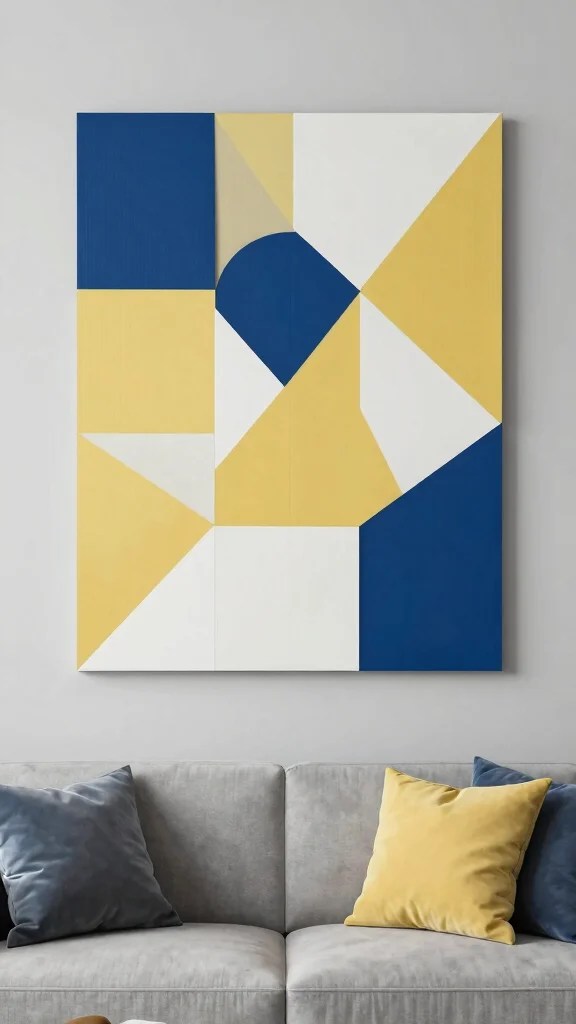
Embrace the beauty of geometric wall paneling to create a striking visual impact in any room. This design principle thrives on the interplay of shapes and colors, offering both aesthetic appeal and a sense of order. Picture vibrant triangles and rectangles in hues that complement your existing decor, arranged in a pattern that invites admiration and curiosity. Whether you choose bold colors or opt for a chic monochrome palette, this style adds a modern flair to your space.
To bring your geometric vision to life, start by sketching your design on paper. Use a sharp utility knife to cut cardboard into your desired shapes, ensuring precision for a polished finish. For a budget-friendly option, consider sourcing paint samples or leftover cardboard from previous projects to keep costs low.
Consider these tips to elevate your wall paneling project:
– Pair contrasting colors for a vibrant effect.
– Install shapes at varying heights for added dimension.
– Use adhesive foam squares for a 3D appearance.
This approach not only enhances visual interest but also creates a captivating focal point. The mix of colors and textures will make your design truly stand out.
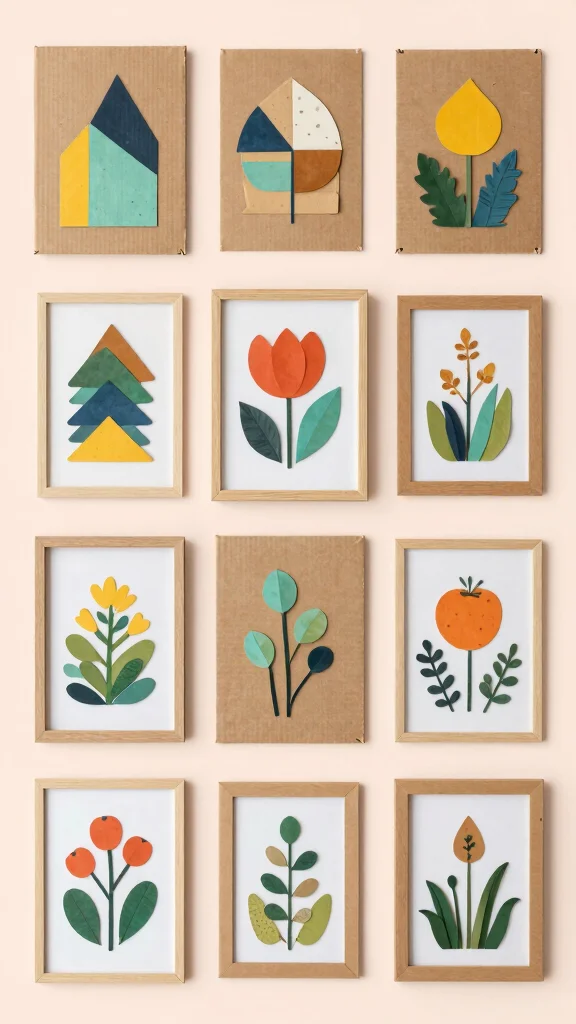
2. Cardboard Framed Art
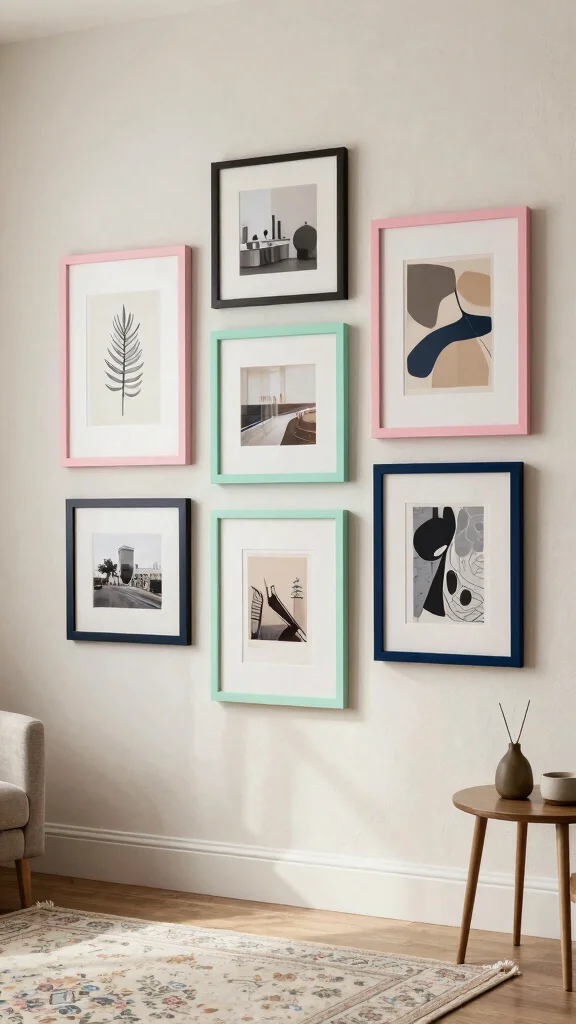
Transform your cherished photographs into stunning art pieces with custom cardboard frames. This DIY project allows you to showcase your favorite memories while adding a personal touch to your decor. By cutting strips of cardboard and assembling them into frames, you can create a unique display that reflects your style and creativity. Paint the frames in colors that harmonize with your space for a cohesive look.
Once your frames are complete, arrange them in a gallery style to create a captivating wall display. This project can be done affordably by using scrap cardboard and inexpensive paint or fabric. The customization options allow you to express your personality, whether you prefer a chic uniform look or an eclectic mix.
Here are some ideas to enhance your framed art:
– Cover frames with patterned paper for added texture.
– Arrange frames at different angles for an artistic flair.
– Use a strong adhesive to ensure durability.
This creative endeavor adds warmth and character to your home, celebrating your most treasured moments in style.
Fun fact: Cardboard framed art can cut framing costs by up to 60%, and uses 100% recyclable materials. It’s a simple DIY for turning photos into cardboard diy wall art that looks chic.
Cardboard Framed Art
Editor’s Choice


🎨 Elevate Your Home Decor Today
Transform your cardboard art ideas into stunning wall decor that is eco-friendly and stylish for any home.
3. Upcycled Cardboard Letters
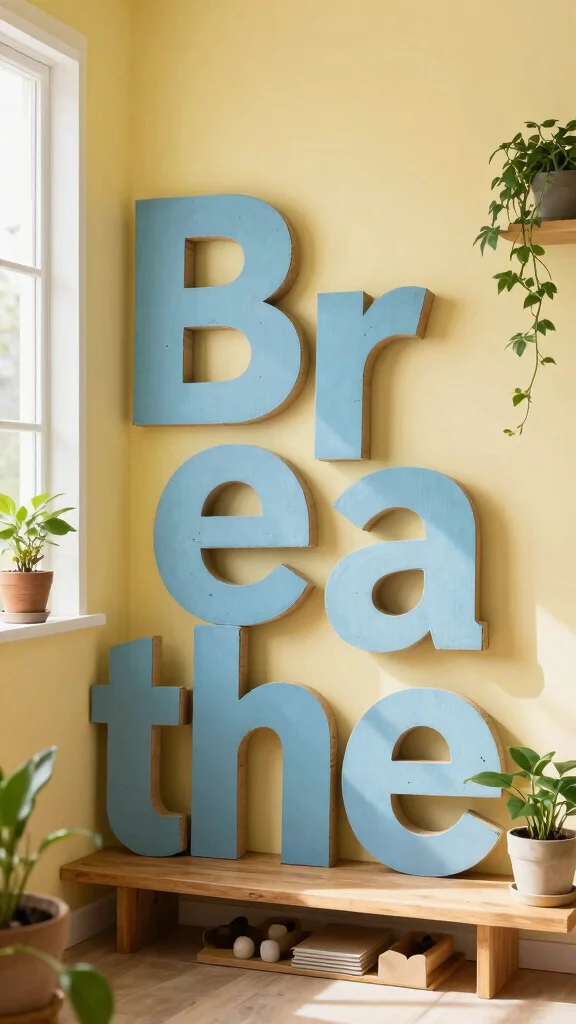
Crafting upcycled cardboard letters allows you to express your thoughts and style in a playful way. Cut out letters from cardboard to spell meaningful words or phrases, such as ‘Joy’ or ‘Welcome’, that resonate with you. Once shaped, embellish them with paint, fabric, or colorful wrapping paper, ensuring they blend seamlessly with your decor.
These letters can be placed on shelves as decorative pieces or mounted on the wall for a striking display. This budget-friendly project offers a unique opportunity to infuse your personality into your space. Make sure the letters are sturdy enough for freestanding displays or securely attached to the wall for a polished look.
Consider these tips for your cardboard letters:
– Use a blend of textures for visual intrigue.
– Incorporate backlighting for an enchanting nighttime effect.
This playful art form not only personalizes your space but also acts as a source of inspiration in your everyday life.
Fact: Upcycled cardboard letters can cut wall art costs by up to 60% in cardboard diy wall art projects and still look stylish. Personalize phrases like ‘Joy’ or ‘Welcome’ with paint or fabric—it’s budget-friendly, eco-friendly, and totally on-trend.
4. Nature-Inspired Wall Cutouts
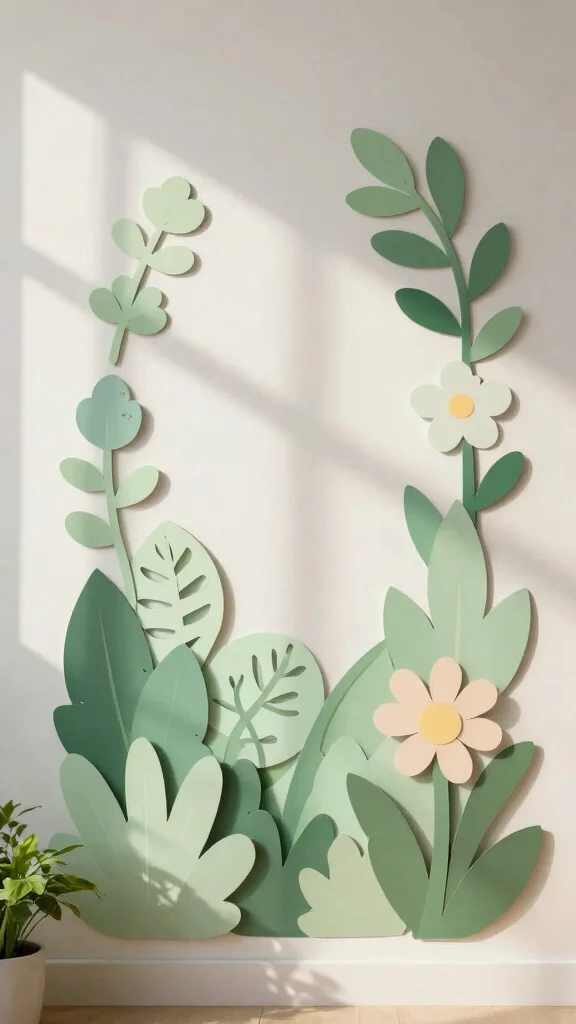
Invite the beauty of nature indoors with cardboard cutouts inspired by leaves, flowers, and trees. This design brings an organic and refreshing feel to your home, creating a serene atmosphere. Cut out shapes from cardboard and paint them in earthy tones or vibrant colors that resonate with your personal style. Layer different shapes to mimic the depth of a forest, making your wall feel alive.
These cutouts can stand alone or be grouped to form a stunning nature scene. This project not only brightens your space but also reflects your love for the outdoors. Experiment with various sizes to achieve a whimsical, free-spirited vibe throughout your home.
Enhance your nature-inspired decor with these suggestions:
– Add embellishments like twine or faux flowers for charm.
– Position cutouts in well-lit areas for captivating shadow play.
This creative approach to wall art will invigorate your space with a sense of tranquility and connection to nature.
Nature-Inspired Wall Cutouts
Editor’s Choice


How To Choose Cardboard DIY Wall Art
When you’re diving into the world of cardboard DIY wall art, making the right choices can significantly impact the outcome of your project. Whether you’re aiming for a chic geometric design or a rustic flower display, here are some key points to consider.
1. Size Matters
Start by measuring the space where you want to display your cardboard wall art. Think about how large or small you want the piece to be. A general rule is to aim for a piece that’s about two-thirds the width of the space it will occupy. This helps create balance and draws the eye.
2. Material Quality
Not all cardboard is created equal. Look for thicker cardboard that can withstand bending and cutting without falling apart. Recycled cardboard can be a great choice as it’s both eco-friendly and durable. Check for any imperfections or damage that might affect your art.
3. Design Style
Consider the overall decor of your room. Do you want something modern, rustic, or whimsical? Geometric shapes add a contemporary vibe, while nature-inspired art can bring warmth and charm. Make sure your design complements existing colors and styles in your home.
4. Tools and Supplies
Think about what tools you’ll need for your project. Basic items include scissors, a craft knife, glue, and possibly paint. If you’re doing more intricate designs, you might need a cutting mat and precision tools. Ensure you have everything on hand to avoid interruptions.
5. Budget Considerations
Creating cardboard wall art is typically affordable, but it’s wise to set a budget for your supplies. Factor in costs for tools, paints, and any additional materials. If you’re crafting multiple pieces, consider bulk purchases to save money.
6. Time Commitment
Some projects can be completed in a few hours, while others may take days due to drying and layering. Estimate how much time you can realistically dedicate to your art. If you’re aiming for more complex designs, plan for extra time.
Pro Tip: Start with smaller projects to build your skills and confidence. Once you feel comfortable, you can tackle larger, more intricate designs. This gradual approach will help you refine your techniques and enjoy the process even more!
By keeping these criteria in mind, you can create stunning cardboard DIY wall art that enhances your home decor and reflects your personal style. Happy crafting!
5. Cardboard Mosaic Art
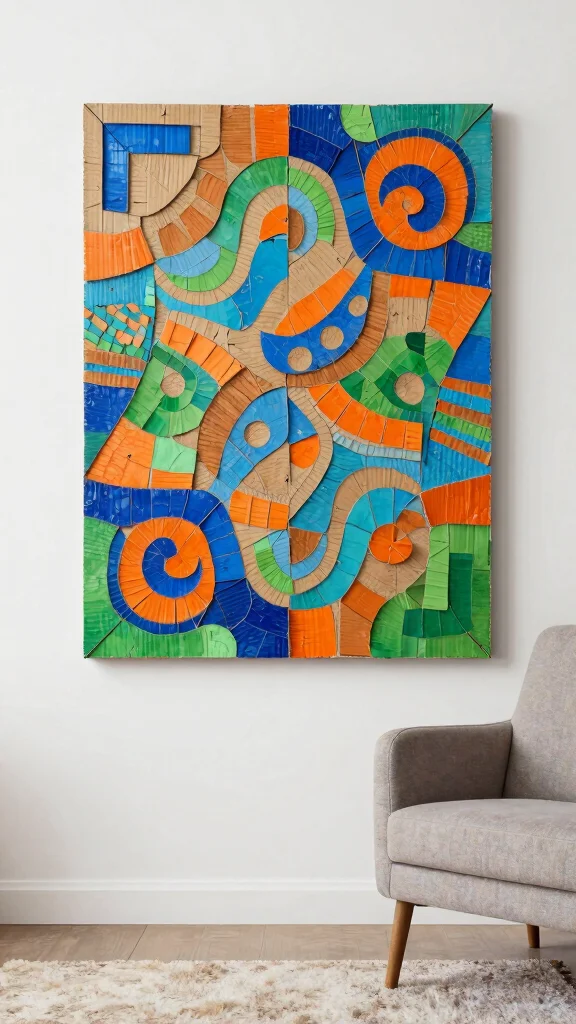
Unleash your creativity with a cardboard mosaic art project that transforms simple materials into stunning visuals. Gather various cardboard pieces and cut them into small squares or rectangles to build a unique mosaic pattern or abstract design. You can either leave the cardboard in its natural state for a rustic vibe or paint the pieces to create a colorful masterpiece.
Once your design is complete, securely glue down the pieces to ensure longevity. This enjoyable DIY project not only allows for artistic expression but also adds a tactile element to your walls. Consider using leftover cardboard from packaging to keep your costs minimal.
Here are some ideas to inspire your mosaic:
– Develop a theme, such as a sunset or ocean waves.
– Seal your artwork with a clear spray for durability.
This artistic endeavor not only beautifies your space but also showcases your imagination in a fun, hands-on way.
Fun fact: a single cardboard sheet can yield around 100 tiny tiles for a mosaic, perfect for cardboard diy wall art. It turns scrap pieces into a vibrant, budget-friendly centerpiece.
You might also like
6. Cardboard Shadow Box Display
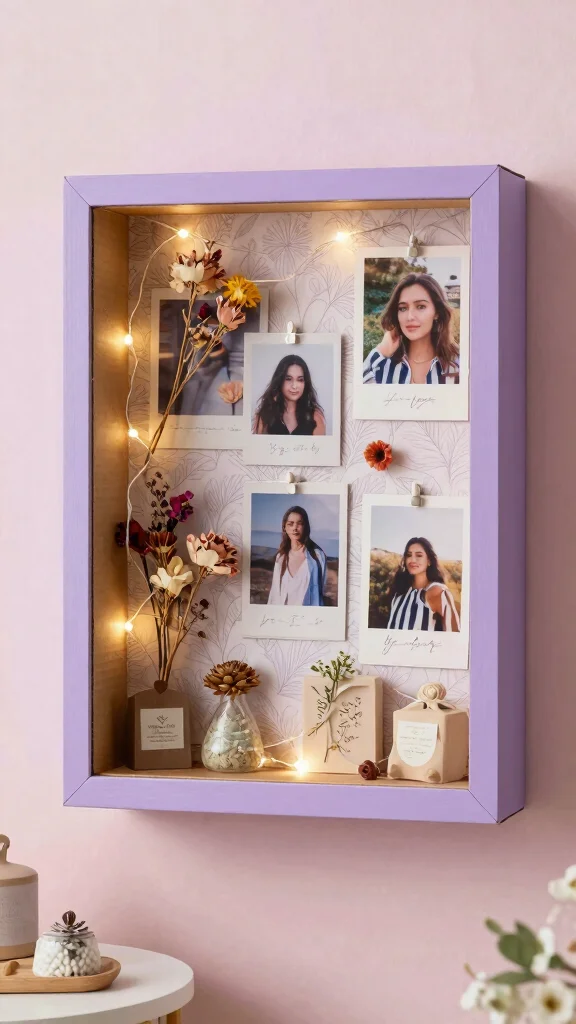
Create a captivating cardboard shadow box display to showcase your favorite memories and collectibles. Start by constructing a sturdy box frame from cardboard, adding multiple levels for depth and interest. Decorate the interior with paint or patterned paper, then fill it with small treasures, photographs, or dried flowers that tell your story.
This unique piece can be hung on the wall, serving as both art and a conversation starter. By displaying items of sentimental value, you infuse your space with warmth and personality. Ensure the items inside are lightweight to maintain stability on the wall.
Consider these ideas to enhance your shadow box:
– Experiment with lighting, such as fairy lights, for a magical effect.
– Use decorative elements like fabric or ribbon for added charm.
This project not only beautifies your space but also preserves cherished memories in a creative way.
Cardboard Shadow Box Display
Editor’s Choice


7. Cardboard Flower Wall Art
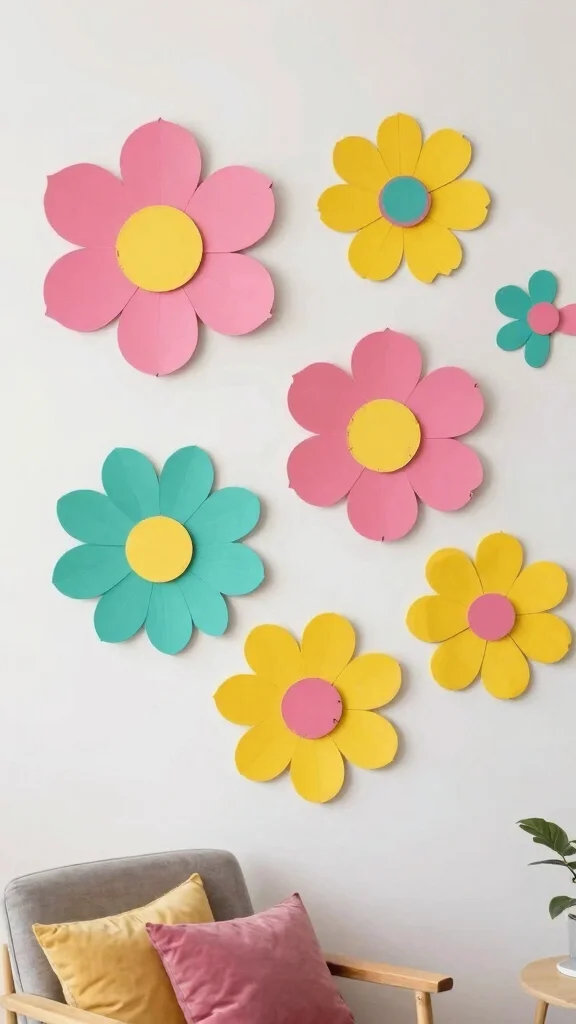
Create vibrant cardboard flower wall art to infuse your space with joy and color. Cut cardboard into petal shapes and layer them to craft stunning flowers that brighten any room. Paint the petals in gradient hues or stick with a bold single shade for a minimalist style. Once complete, these flowers can be glued to the wall or mounted on wood for a striking display.
This cheerful decor piece is perfect for adding personality to bedrooms or living rooms, delivering a fresh, botanical element without maintenance. Mix different sizes of flowers for a dynamic arrangement that draws the eye.
Here are some tips for your flower art:
– Consider adding green cardboard stems and leaves for a complete look.
– Use varying colors for a more playful display.
This delightful project not only beautifies your home but also brings a sense of warmth and happiness.
Cardboard Flower Wall Art
Editor’s Choice


8. Cardboard Map Art
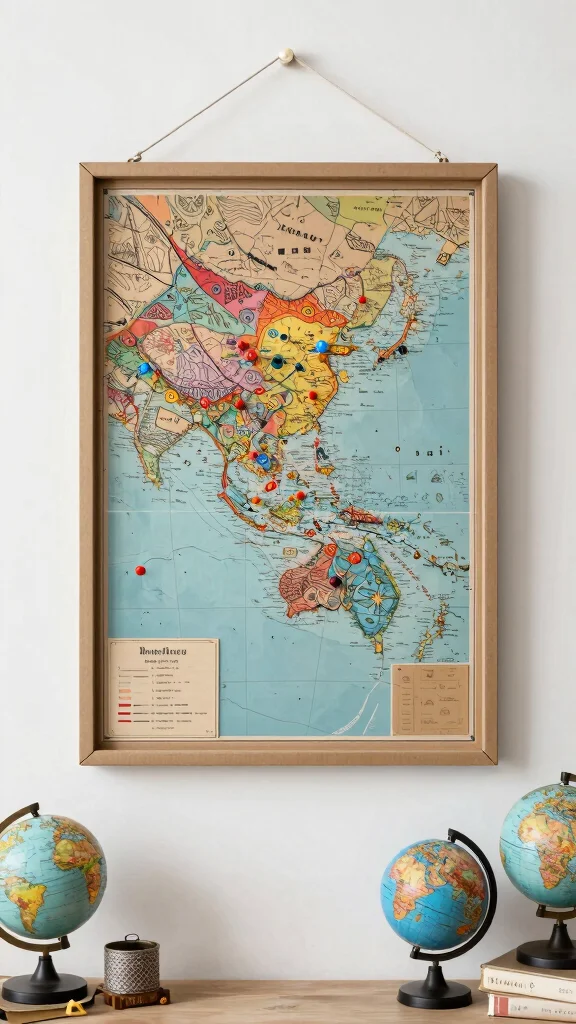
Showcase your wanderlust with a creative cardboard map art piece. Cut out a world map or your favorite country from cardboard, then personalize it with colors or patterns that resonate with your travel experiences. Mark locations you’ve visited with small pins or photos to create a narrative of your adventures.
This captivating map can serve as a unique focal point in your home while sparking conversations about your travels. To enhance the aesthetic, consider framing your map with additional cardboard or leaving it raw for a rustic charm.
Explore these ideas for your map art:
– Use a jigsaw for intricate designs to maintain detail.
– Pair it with travel-themed decor for a cohesive display.
This artistic representation of your journeys not only beautifies your space but also celebrates your love for exploration.
9. Cardboard Wall Hanging Tapestry
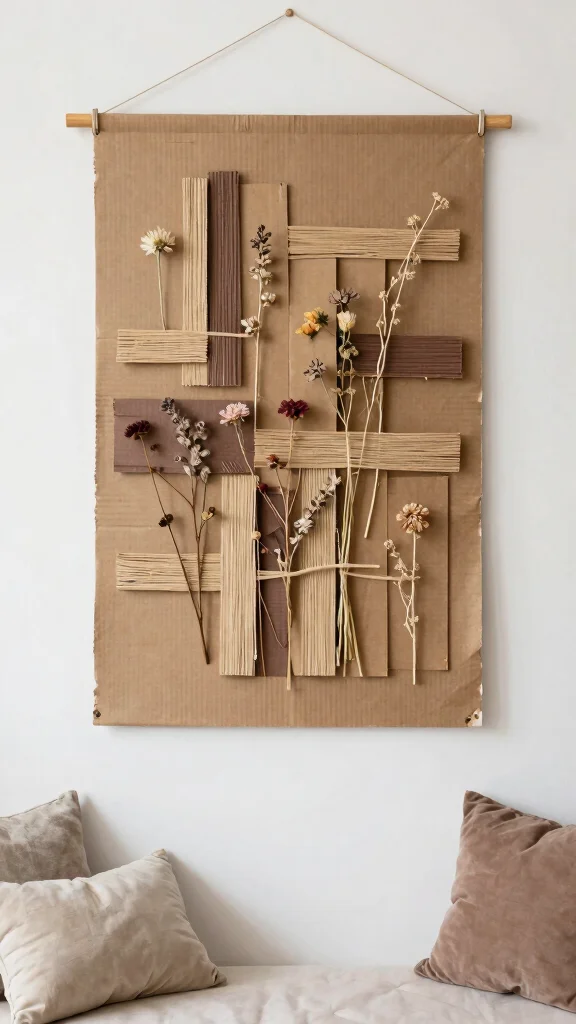
Design an elegant cardboard wall hanging tapestry that adds texture and artistry to your space. Cut strips of cardboard into varying lengths and widths, arranging them on a larger piece of cardboard or a wooden dowel to create a stunning tapestry effect. Weave in natural elements like twigs or dried flowers for added visual interest and depth.
This unique art piece can serve as a statement installation in minimalist or bohemian settings, enhancing your home with texture without overwhelming it. Play with the arrangement until it feels just right for your aesthetic.
Here are some tips for your cardboard tapestry:
– Use natural colors to maintain a grounding effect.
– Incorporate fabrics or yarn for added warmth.
This creative endeavor not only beautifies your walls but also elevates the overall ambiance of your home.
You Might Also Like
10. Cardboard Picture Ledge
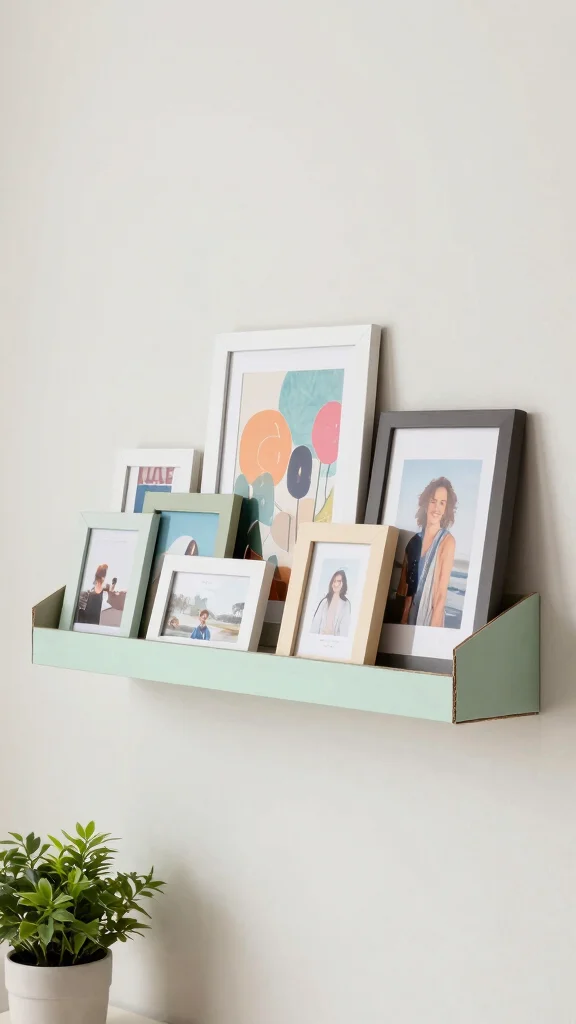
Build a charming cardboard picture ledge to display your favorite photos and art pieces. Cut and assemble a sturdy ledge from cardboard that can hold framed pictures or small artworks, adding a personal touch to your decor. Paint the ledge in a color that complements your space or leave it natural for an earthy vibe.
Once secured to the wall, this ledge allows you to easily update your gallery without the need for nails or hammers. Change your displayed items frequently, keeping your space fresh and inviting.
Consider these suggestions for your picture ledge:
– Ensure it’s wide enough to prevent items from tipping.
– Use vibrant colors for a lively and engaging display.
This practical yet stylish addition to your home creates an uplifting environment filled with memories.
Cardboard Picture Ledge
Editor’s Choice


11. Cardboard Wall Clock
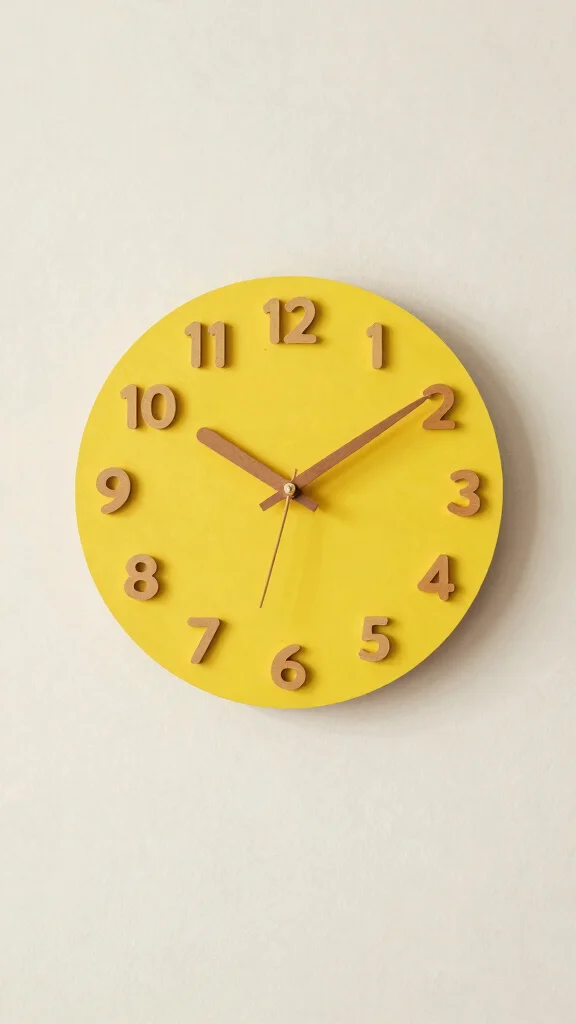
Combine functionality and creativity by crafting a cardboard wall clock that doubles as art. Cut a large circle from cardboard for the base and smaller pieces for the clock hands, ensuring they fit your style. Decorate the base with paint or patterned paper to match your decor, creating a unique focal point.
This project not only serves a practical purpose but also enhances your living space with a personal touch. Once assembled, add a reliable clock mechanism from a craft store to keep your timepiece functional.
Here are some creative ideas to personalize your clock:
– Experiment with unique shapes instead of a standard circle.
– Use smaller cardboard pieces for numbers or markers.
This artistic timepiece not only adds character to your room but also keeps you punctual in style.
Conclusion
Cardboard DIY wall art opens up a world of creativity while promoting sustainability in your home decor.
Each of these ideas not only showcases your artistic skills but also reflects your commitment to eco-friendly living. From geometric designs to personalized shadow boxes, there’s a project here for everyone. Embrace the unique charm of cardboard art, and watch your walls come alive with personality!
Which design will you try first?
Note: We aim to provide accurate product links, but some may occasionally expire or become unavailable. If this happens, please search directly on Amazon for the product or a suitable alternative.
This post contains Amazon affiliate links, meaning we may earn a small commission if you purchase through our links, at no extra cost to you.
Frequently Asked Questions
What materials do I need to start with cardboard diy wall art at home?
Getting started is affordable and simple. Gather cardboard sheets (recycled boxes work great), a sharp craft knife or box cutter, a metal ruler, pencil, and glue (PVA or hot glue). Add basic supplies like acrylic paints or markers for color, brushes or sponges, and a sealant to protect your cardboard diy wall art once it’s finished. If you want texture, use corrugated panels or cut-and-stack layers to create upcycled wall art with depth. Keep safety in mind: cut away from yourself and work on a sturdy surface. With these essentials, you’re ready for your first DIY home projects bringing stylish, affordable home decor into any room.
How can I choose the best cardboard wall decor ideas for a small space?
For small spaces, go for scalable, modular designs and lighter tones. Start with a few focal pieces from the cardboard wall decor options or a set of creative wall art tiles that can be arranged in different ways. Consider thin, flat pieces that won’t protrude too much and align them with your room’s color scheme to keep the space feeling open. This approach helps you experiment with upcycled wall art and affordable home decor without overwhelming the room.
Are there easy upcycled wall art projects using cardboard that are beginner-friendly?
Definitely. Begin with a simple geometric cut or a single-layer design, then add depth by layering pieces. Use upcycled wall art techniques like combining corrugated textures with paint, then seal for durability. These DIY home projects are beginner-friendly and prove that cardboard diy wall art can look surprisingly stylish in any space.
What finishing techniques make cardboard diy wall art look stylish and durable?
Focus on protective finishes and clean color. Apply a clear acrylic sealant or matte varnish to guard against dust and moisture. Prime the base if needed, then paint with acrylics for crisp color, or use decoupage to add textures. Add subtle metallic accents or stencil details with creative wall art touches, and frame or mount the piece with lightweight options for a modern, affordable home decor look.
How can I customize cardboard wall decor to fit my home aesthetic and color scheme?
Mix and match colors that echo your space, painting bases in chosen shades and adding patterns with stencils or simple shapes. Combine flat panels with a few corrugated pieces to create creative wall art with depth, or design a modular display that can be rearranged. By planning your display to align with your furniture, lighting, and overall vibe, your cardboard wall decor becomes a cohesive, stylish piece of affordable home decor.
Related Topics
home decor
cardboard wall art
upcycled decor
DIY home projects
creative wall art
affordable decor
eco-friendly design
beginner friendly
stylish DIY
sustainable art
easy crafts
minimalist wall decor
Leave a Reply