
A neck pillow is a horseshoe-shaped cushion you sew from a half yard of fabric to support your head upright while sleeping in a seat. The trick is getting the curve right: too tight and it pinches, too loose and your chin still drops. That 14-inch height and 20-inch width in the pattern is the difference between a pillow you actually use and one that lives in a closet.
Gather Materials

Fleece, cotton, and flannel all work for a neck pillow, though fleece tends to be the most forgiving if your seams are slightly uneven. A standard ½ yard of 44-inch fabric is generally sufficient for one pillow, but grab ¾ yard if you want to fussy-cut a large motif. For stuffing, polyester fiberfill is the beginner-friendly choice: at least a 12 oz. bag fills a standard pillow without leaving you short. Rice or buckwheat hulls shift the pillow into therapeutic territory, since you can microwave it for heat, though rice makes the finished piece noticeably heavier. You’ll also need all-purpose thread, a see-through ruler, fabric pen or pencil, scissors or rotary cutter with mat, straight pins, seam gauge, and a hand-sewing needle to close the opening.
Recommended Products

>Brand: Croker Horse. We are committed to providing luxury home life, choose advanced materials, modern custom design, so that every family can use high-quality home enjoyment.

Super-soft Micro Bead Travel Pillow

The Felt Horseshoe Mini Pillow Is A Charming Addition To Any Space, Featuring Intricate French Knot Embroidery That Adds A Touch Of Elegance
Cut Fabric to Shape

A horseshoe neck pillow pattern runs about 14 inches tall and 20 inches wide, with the arms at 8 inches thick and the top slightly narrower at 7 to 8 inches. That curve matters more than it looks; too tight and the pillow pinches your neck, too loose and your head falls forward anyway. I trace the shape onto folded paper first, cut half, and unfold for symmetry so both arms match.
Stack your outer fabric right-sides-in and pin the pattern flat. The seam allowance is 3/8 inch or 1 cm all around, which means tracing that line outside your finished-size pattern, not cutting the pattern itself larger. I forgot this once and ended up with a pillow two sizes too small. If you are adding a lining, cut a second identical pair the same way. Clip curves after sewing, not before, or the raw edges fray where you need them clean.
Recommended Products

Premium Fleece Fabric: Our fleece fabric is crafted from high-quality materials, offering a clear texture and unbeatable fluffiness.

High-Quality Material: Made of premium fleece, offering clear organizational texture, excellent fluffiness, and superior warmth. Mute Touch fabric is brighter, softer, faster drying, and easier to clean.

PREMIUM POLAR FLEECE FABRIC FOR ALL PROJECTS – This soft fabric is crafted from high-quality materials, offering warmth, durability, and comfort. Ideal for blankets, throws, jackets, scarves, and pet beds, this plush fabric is perfect for home décor and crafting. Whether you need fleece fabric for apparel or cozy accessories, this blanket fabric ensures exceptional softness and versatility.
Sew the Pieces Together

Pin the two cut pieces with their right sides facing each other, matching the curves as closely as you can. A ¼" to ½" seam allowance works for most fabrics, though I’d lean toward the wider end if the material feels thin or slippery. Leave a gap of about 4 inches along one straight edge for turning and stuffing later; some patterns put this on the inner curve where it hides best, but that spot is harder to hand-stitch closed afterward. Sew the perimeter, backstitching firmly at both sides of the gap since those points take stress when you turn the pillow and pack it full. A 3/8" allowance is the middle ground if you want one number to default to.
Recommended Products

Polyester Fiber Fill: Our package includes 100g polyester stuffing, the premium polyester fiber fill is packaged in a compression bag. When you open the pack, you may still have to wait a few hours for the softness and fluff to return

100% Premium polyester fiber

Polyfill Stuffing: Premium polyester fiber fill, fine and dense fiber, good warmth retention, not easy to agglomerate, high resilience. Warm Tip: The product packaging is slightly different from the old and the new, which does not affect normal use.
Turn Right Side Out

The gap you left for turning should feel generous once the fabric is bunched up inside itself. I aim for about 5 cm, or roughly 2 inches, on a long straight edge; any smaller and the stuffing step becomes a fight. Before you reach inside, clip the curves along the seam allowance, snipping small triangles close to but never through the stitch line. The tighter the curve, the more clips you need, or the seam will pucker instead of lying flat.
Reach through the opening and pull the pillow through. A chopstick, a short ruler, or even a pencil with the lead snapped off works to push the seams fully out, especially at the ends where the curve is tight. Run it along the inside edge so the seam rolls to the outside cleanly. If a corner refuses to smooth, a quick press with the iron from the right side usually fixes it, though I only bother if the fabric is thick enough to hold a crease.
Recommended Products

Fast Relaxation: The microwave heating pad is perfect for neck, shoulders and back relaxation. Heat it to soothe muscle tension, stiffness, and soreness. Experience rejuvenation with our heated neck wrap

☮️ The heatable pillow has an all-natural buckwheat seed filling that can be used in the microwave or freezer. The hot or cold pillow can be applied directly on the affected area for muscle relaxation or pain management.

Unique Contoured Desaign: The buckwheat pillow concave middle section cradles your neck, filling gaps and stretching cervical muscles for targeted pain relief and spinal alignment; buckwheat neck pillow offering vertical, horizontal support, and curvature stretch for neck traction;
Stuff the Pillow

Polyester fiberfill packs down with use, so what feels right at the table will soften after a few nights against your neck. I stuff a little fuller than I think I want, knowing it will settle. Rice or buckwheat hulls behave differently: they shift rather than compress, giving a heavier, more grounded feel that some people find supports the neck better but can feel like a sack instead of a pillow if you overfill it. Rice also lets you warm the pillow in the microwave, which turns it into a therapeutic wrap, though you will want to sew those closing stitches tight and small so nothing escapes.
For a travel neck pillow, light matters. Polyester stays airy; buckwheat hulls are still lighter than they look but add noticeable weight by comparison. My own call is fiberfill for anything that leaves the house, buckwheat only if the pillow lives on one chair and never travels. Firmness is the harder choice. Too soft and your chin drops; too firm and the pillow pushes your head forward instead of cradling it. The horseshoe shape helps here because the ends can sit under the jaw while the back stays moderate, but only if the fill is even. Work it in small handfuls, pushing each one to the bottom before adding the next, or you will end up with a lumpy ridge right where your skull rests.
Recommended Products

Wake up refreshed with personalized support – This adjustable side sleeper pillow for adults lets you shape your sleep. Add or remove shredded fill to dial in firmness and loft so head, neck, and shoulders align – mornings feel restored.

[CERVICAL NECK PILLOW FOR NECK SUPPORT] Combining traditional bed pillow comfort with contour pillow support, our butterfly pillow transforms your sleep. Its 15° tilted hollow concave surface gently cradles your head, maintaining your neck's natural curve and perfect spinal alignment. The unique butterfly shape evenly distributes pressure to soothe aching necks, while the neck pillow armrest area allows unrestricted arm positioning for extra comfort. Wake up feeling refreshed!

International travel is the true testing ground for how well a neck pillow works. Transit’s premium neck pillow’s with our exclusive Dual-Chamber Technology and patent pending design starts with a responsive memory foam core that firms upon compression, and is actively adjusting for optimal head stability. Combined with an outer layer of luxury premium memory foam for cradle-comfort that relieves fatigue caused by air travel.
Close the Opening

A neck pillow gets grabbed, squished, and twisted every time it leaves the house, so the closure at the gap needs to hold. The ladder stitch is the move here: a hand stitch that hides inside the seam allowance and keeps the stuffing where it belongs.
Start at one end of the opening and work the needle a short distance into the folded edge on one side, then directly across to the other. The thread travels straight across the gap while the fabric folds hide it, creating a row of stitches that looks like a ladder from the inside and disappears from the outside. With a firmly stuffed pillow, pulling each stitch tight immediately puts strain on the thread. I make several stitches first, leave them loose, then draw them all together at once so the tension spreads across the line instead of snapping a single thread.
Once the gap closes, I run the needle back through the same path for extra security, especially with fabric prone to fraying. To finish, I push the needle deep into the pillow, bring it out an inch away, and snip the thread flush so the tail vanishes inside. No knot on the surface means no lump against the neck, and no loose end to work loose after the third flight.
Recommended Products

【Design and Fabric】: Made from premium jacquard fabric, this pillow cover features a stylish brown base, adorned with embroidered horseshoe buckles and jacquard leopard patterns, and finished with velvet on the back. Exquisitely crafted, it offers a soft and comfortable touch, with a thick and durable texture that combines visual appeal with long-lasting functionality, adding a touch of light luxury to your living space.


>Brand: Croker Horse. We are committed to providing luxury home life, choose advanced materials, modern custom design, so that every family can use high-quality home enjoyment.
Optional Removable Cover

A removable cover turns a travel neck pillow from a one-and-done project into something you can actually live with. After a few trips, the surface collects enough skin oil, spilled coffee, and hotel-room dust that tossing the whole pillow in the washer starts to feel risky. The filler shifts, the shape warps, and you end up with a lumpy crescent that no longer supports anything.
The construction difference is small but specific. Instead of sewing the final seam shut, you add a zipper or a snap closure to one of the back pieces before assembling the shell. A zipper gives you a tighter seal and less bulk at the neck, though it takes a zipper foot and a bit of patience to keep the teeth straight on a curve. Snaps are faster to install and lie flatter, but they can gap slightly if the cover is stuffed tight. Either way, you are building a shell that slips on and off, leaving the inner pillow intact.
For travel use, the payoff is straightforward: the cover goes in the hotel sink or the washing machine, the filler stays dry and in place. One source suggests a half yard of outer fabric, which leaves enough to cut a second cover if you want a spare for the return trip. The extra twenty minutes of sewing pays back within the first long-haul flight.
Recommended Products

Soft & Warm: Made from 100% premium microfiber, our fleece fabric has soft, lightweight, and breathable texture. It is also smooth, soft, and anti-pilling, making it friendly to your skin and a popular choice for no sew fleece throws and blankets.

Fleece Fabric Print by the yard; 60inch wide; Priced by the yard

MATERIAL: Premium knitted polar fleece made from 100% polyester, offering warmth and softness ideal for blankets, clothing, and accessories
Fabric Choices

Fleece traps heat and stays soft after repeated washing, which makes it the default for cold-weather travel or anyone who runs cold at night. Cotton breathes better and washes cooler against the skin, so it suits summer trips or pillows that double as sleep aids in warm rooms. Flannel splits the difference: brushed on one side for loft, smoother on the other, and it breaks in faster than fleece without the slickness of new cotton.
| Fabric | Warmth | Breathability | Best For |
|---|---|---|---|
| Fleece | High | Low | Travel, winter use, heat therapy retention |
| Cotton | Low | High | Warm sleepers, summer travel, easy washing |
| Flannel | Medium | Medium | Year-round comfort, quick break-in period |
For heat therapy, fleece holds warmth longest after microwaving, though cotton wins if the pillow needs to cool down between uses. Flannel’s real advantage is that it feels lived-in immediately; a cotton neck pillow takes three or four washes to lose its crispness, and fleece can feel clammy against bare skin in a hot car.
Recommended Products

Basic Information: 100g/3.5oz premium polyester fiber fill, fine and dense fiber, good warmth retention, not easy to agglomerate, high resilience.

☁️ 100% Premium Polyester Fiber Fill – Discover an unmatched level of softness. Our unique polyester fiber blend offers exceptional resilience and a smooth texture, preventing any bunching of fibers.

Crafters love Poly-Fil!A unique process explodes the special blend of 100% polyester fibers creating an extraordinary resilience that maintains its integrity through countless launderings. Use for all types of craft and home décor projects.
Stuffing Options

Polyester fiberfill is the default for a reason: it stays light under your head and washes clean in a machine. Rice shifts the pillow into therapy territory, since a minute or two in the microwave turns it into a heated wrap that drapes around sore muscles. Buckwheat hulls carry more heft and feel firmer against the neck, but they also bring the weight and the eco-conscious edge of a natural fill that will not trap heat the way synthetics do.
| Fill | Support Level | Weight | Heat Retention | Care |
|---|---|---|---|---|
| Polyester fiberfill | Light to medium | Light | Moderate | Machine washable |
| Rice | Moldable | Medium | Microwaveable for heat therapy | Spot clean; do not wash |
| Buckwheat hulls | Firm | Heavier | Low | Empty hulls to wash shell |
The catch with rice is moisture: any dampness left in the grains and you are risking mold inside a sealed seam. Buckwheat hulls solve that, though refilling them after a wash is a small chore, and the pillow ends up heavy enough that it will not travel as easily. For a neck pillow that lives on the couch or the bed, that weight is not a problem. For something that rides in a carry-on, polyester still wins.
Recommended Products

THERAPEUTIC NECK PILLOW: Relax tension, soothe aches, and relieve soreness with our wearable spa neck warmer. Microwavable heating pads for neck and shoulders by SunnyBay never fail to disappoint!

SIZABLE COMFORT – The large size heartwarmer pillow is 10×10.5" in size
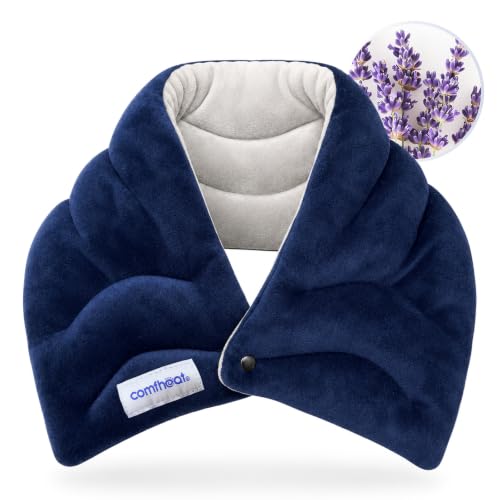
【Moist Heat Neck Wrap】 The reusable neck heating pad generates moist heat when heated, effectively relieving neck and shoulder tension and helping to relieve pain caused by stiffness, cervical spondylosis, soreness
Pillow Shapes

The shape you pick determines how the pillow behaves under your neck. Four designs stand out for home sewing, and two of them have the strongest backing in the tutorials that rank for this project.
- Horseshoe-shaped travel pillows wrap the neck with structured support. The usual adult size runs about 15 inches from bottom to top curve and 20 inches across when laid flat, with the padded ring measuring 7–8 inches thick. Fold your pattern paper in half, draw one side, and cut for symmetry. This is the shape most sources treat as the default.
- Bow-tie pillows taper at the center and swell at the ends, giving therapeutic support without the rigid frame. One popular version finishes in under an hour and includes loop handles for repositioning. Cotton décor fabric keeps it crisp; flannel or plush fleece warms it up. This shape gets the most enthusiastic repeat-use testimony from the sources.
- Tube pillows are simple cylinders, easiest to sew but least contoured. They work when you want basic padding and nothing more.
- Sock pillows are small rice-filled tubes, often with dried lavender added. Heat them in the microwave at one-minute intervals, shaking between each, and drape around the neck for warm therapy. The rice filling demands tight, small stitches at the closure so nothing leaks.
Between the horseshoe and the bow-tie, the bow-tie wins for actual neck support; the horseshoe wins for travel and upright napping.
Recommended Products

【 2 in 1 Cervical Neck Pillow 】 This pillow is different from traditional pillows, it combines a Neck roll Pillow and a Cervical Pillow in One. The unique concave shape will fit the neck and will fill the gap with the neck and gently stretch the neck. Neck sleeping pillow provides neck support and relief for all sleepers and neck pain. Ideal for cervical spine stretched, neck pain relief.

LOW-PROFILE FLAT BACK: Rests comfortably against the seat without the bulky rear cushioning that can push the head forward.
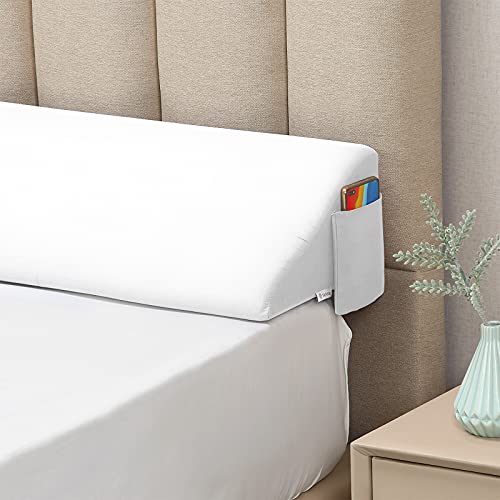
Fill Bed Gaps, Say Goodbye to Falling Items: The Vekkia Bed Wedge Pillow is specially designed to fill the gap between your mattress and headboard, fitting gaps from 0 to 6 inches. It effectively prevents pillows, pets, and small items from slipping through, letting you enjoy uninterrupted comfort every night
Sewing Techniques

Backstitching at the ribbon or tape keeps the seam from popping when the pillow gets tugged around in a car or jammed against a headrest. I lock the stitches on both sides of the 3" to 4" turning gap so the opening does not unravel the second I start pushing the stuffing through. The gap itself wants to sit in the middle of a long straight edge, not on a curve, or turning the pillow right side out becomes a fight.
Once the pillow is stuffed, the ladder stitch is what makes the closure disappear. I work a few stitches on one folded edge, then the other, without pulling tight until a short run is in place; that keeps the thread from snapping against a firmly packed fill. Going back over the same line once more secures fabrics that tend to fray. To finish, I bury the needle into the pillow, bring it out an inch away, and snip so the tail vanishes inside. The result holds up to daily use and looks like it was never opened.
Frequently Asked Questions
What materials do I need to make a neck pillow?
You need ½ yard of 44-inch fabric (¾ yard for fussy-cutting large motifs), polyester fiberfill or another stuffing material, all-purpose thread, a see-through ruler, fabric pen or pencil, scissors or rotary cutter with mat, straight pins, seam gauge, and a hand-sewing needle. Fleece, cotton, or flannel all work as fabric choices, with fleece being the most forgiving for slightly uneven seams.
How do I make a neck pillow?
Cut two mirrored pieces from your fabric using a horseshoe pattern about 14 inches tall and 20 inches wide, sew them right-sides-together with a 3/8 inch seam allowance while leaving a 4-inch gap for turning, clip the curves, turn right side out, stuff to your preferred firmness, and close the opening with a ladder stitch. The 3/8 inch or 1 cm seam allowance is measured outside your finished-size pattern, not by enlarging the pattern itself.
What is the best filling for a neck pillow?
Polyester fiberfill is the beginner-friendly default: it stays light, washes easily, and at least a 12 oz. bag fills a standard pillow. Rice lets you microwave the pillow for heat therapy but makes it noticeably heavier and demands tight closing stitches so grains do not escape. Buckwheat hulls feel firmer and more grounded with low heat retention, though refilling after washing the shell takes extra effort.
Leave a Reply