
A latch hook rug is a craft project made by knotting short pieces of yarn through a gridded canvas, producing a thick, shaggy surface. What you do with that finished piece matters more than most people expect, because the sizing works backward: a 30-by-36 inch canvas shrinks to an 18.5-by-27 inch rug once the yarn fills the grid and the edges are bound. That compression trips up first-timers who hook straight to the border and watch the corners pull loose within a week.
1. Make a Rug

The most straightforward way to use a finished piece is as an actual rug, but the sizing works differently than you might expect. A common finished rug measures 18.5 by 27 inches, yet that starts from a 30 by 36 inch canvas. The extra canvas disappears into the process: you need at least one inch of unhooked margin on every edge for finishing, and the hooked area compresses inward as the yarn fills the grid.
That unhooked border matters more than it looks. Whip-stitching the edges hides the raw canvas and gives the rug a cleaner line, but it also eats into your dimensions. Plan the hooked design smaller than the canvas you buy, or you will end up with a rug that floats in the middle of a bare floor instead of covering it.
For hard floors, the backside needs attention. Latch hook rugs are slippery on tile, wood, or laminate. A non-slip rug pad stitched to the back works and costs less, though the foam can tear if you pull the yarn too tight. Brushable rug backing goes on quicker and locks the yarn tails in place, but it runs higher in price and needs ventilation while it dries. Either way, the rug stays where you put it, and the floor underneath stays unmarked.
Recommended Products

MATERIAL: 100 percent polyester. Resists tearing, stretching, and fraying far better than plastic or traditional canvas, ensuring your rug maintains its shape and integrity for years

Dual Size Options (10pcs/Pack): Ideal for bulk rug hooking! Perfect for small DIY projects (mini rugs/hangings) or larger pieces (floor mats/pillow covers).

WIDE PPLICATIONS: The rug canvas mesh is versatile and can be used for embroidery, weaving, crochet, and more, it is suitable for a variety of crafts and projects, its versatility allows you to release your creativity and make various items
2. Make a Pillow

A finished latch hook piece becomes a throw pillow with less work than a full rug demands. The canvas grid itself gives you a built-in seam allowance: leave four rows of canvas intact around the hooked area and trim the excess. Those four rows become the edge you sew through.
For backing, cut a matching piece of plain fabric the same size as your hooked piece. Sew them together inside out with a zigzag stitch, working through the last row of the latch hook canvas to catch all the yarn knots. Leave a six-inch gap, turn right side out, and hand-sew the opening closed. No need to bind the edges separately; the canvas rows and the zigzag do the fraying prevention for you.
Pillow forms are the simpler choice over stuffing by hand. Buy one two inches larger than your finished cover in each direction so the piece stays plump and the shag texture reads properly. A 16-by-16 cover wants an 18-by-18 form. The whole project stays under the cost of a single throw pillow from most home stores, and the time commitment is an evening of sewing, not weeks of hooking a rug-sized field.
Recommended Products
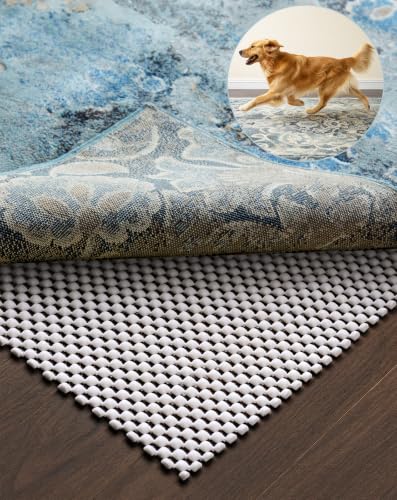
Non-slip Protection: Our pad's signature grip keeps rugs securely in place, preventing bunching and sliding during daily use. It also protects your floors from wear and tear, including damage from high heels, children at play, and more.

THE ORIGINAL EXTRA STRONG GRIPPER: our trusted Gorilla Grip nonadhesive rug pads offer a unique, dual sided grip that firmly holds onto both the rug pad and your hard floor to help prevent rug movement

Unique Design: Do you still worry about the traditional glue rug tape harm your floor ? This gripper uses VACUUM TECH design which grips hard smooth floors firmly and easily, this design can protect your floor perfectly as no glue used on floor. But it does not work for rug on carpeted floor. It does not work for rubber backed rug ,jute rug or fluff backing rug.
3. Make a Wall Hanging

Smaller latch hook pieces, or the odd leftover panel from a kit you abandoned halfway through, sit awkwardly on the floor. The backing is too thin for a rug pad to grip, and the shape fights standard furniture placement. Mounting them flat against the wall turns that fragility into an advantage: the piece weighs almost nothing, so a simple sawtooth hanger on a strip of wood glued to the back is enough. No studs needed, no anchor drama, which matters if you are renting and patching holes later.
Exposed edges are the part that looks homemade in the wrong way. I fold the raw canvas under twice, about a quarter inch each fold, and whip-stitch it down with matching yarn so the edge reads as a clean border rather than a fraying stopgap. Some people run a line of fabric glue inside the fold first; it stiffens the edge and makes the sewing easier, though it does add a slight sheen you may not want.
For pieces under roughly two feet on their longest side, a standard picture frame with the glass removed works fine. The depth of the latch hook pile clears the lip of most frames without compression. Anything larger starts to need custom framing money, at which point I would rather spend the budget on a second small piece and hang them as a pair.
Recommended Products

Complete All-in-One Kit – Everything included: Pre-printed & sewn pillow cover, latch hook tool, soft colorful yarn, and step-by-step English instructions. No extra tools needed – perfect for beginners!
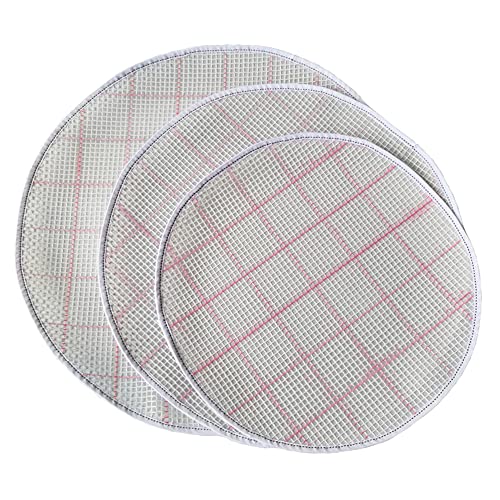
Latch hook kit: this package contains 2 pieces of 50x50cm Round blank rug hooking mesh and 2 pieces latch hook tool, 4 pieces in total, which can satisfy your embroidering needs

Multipurpose: Use this blank rug hooking mesh canvas to create rugs, coasters, wall hangings, and other crafts, the 50x100cm mesh canvas sheets provide ample space for both small and large designs, ideal for home decor projects, gift making, or holiday crafts, unleash your creativity with this versatile mesh canvas fabric
4. Frame It

The thickest latch hook pieces need breathing room, which is why a shadow box frame works better than a flat frame with glass pressed against the yarn. Standard frames can still handle thinner pieces if you add a mat deep enough to keep the glass from flattening the loops. I learned that the hard way with a small floral piece I finished early on: the glass sat right on the surface, and within a month the center loops looked matted down and tired. Matting buys you the clearance you need without the bulk of a full shadow box, though it only helps on pieces under about an inch thick.
Framing turns the rug into something you handle like art rather than something you walk on. That shift matters for pieces with sentimental value or uneven edges that would never lie flat on a floor. The cost runs higher than a dowel hanging or pillow backing, but for a piece you spent twenty hours on, the tradeoff is worth it to stop the wear cycle before it starts.
Recommended Products

elastic band for sewing elastic band pants waist replacement DIY craft elastic luggage reinforcement elastic strap sewing accessories

The Package Length of the Product is 2.5 inches

Comprehensive Quilt Binding Set: our package includes 2 quilting tools, a standard size for quilting 6 inches and a mini size for quilting 3 inches; Designed to meet your quilting needs; These tools cater to both large and small quilting projects providing you with a wide range of options; Enjoy utility with our comprehensive quilt binding set
Supplies Needed

A latch hook rug needs only a handful of tools, but the right ones save hours of frustration. Here is what actually matters.
- Gridded latch hook rug canvas is the one place not to skimp. The printed grid keeps your pattern straight and your tension even; blank canvas leaves you counting threads by eye.
- A latch hook tool with a hinged metal arm, not a crochet hook. The arm closes around the yarn and pulls it through in one motion.
- Pre-cut yarn, typically 2.5 inches long, removes the worst part of the job. Cutting your own yarn to length is possible, but after one try most people buy it ready-cut.
- A yarn needle for binding edges and weaving in ends.
- Rug backing to cover the loose knots on the reverse side and keep the rug from sliding.
Herrschners sells kits that include the canvas, pre-cut yarn, and pattern for specific designs. Their catalog runs to themes like "Harvest Wreath" and "North American Wildlife Montage," which saves the step of choosing colors separately.
Recommended Products

Well Made from High Quality Metal knitting and styling Crochet Hooks, Comfortable to use,Perfect to create beautiful latched rugs,Hair weaves, wigs, carpets or craft.

Package Include: You will get 3 pieces wooden bent latch hook.

NEWLY UPGRADED DIY KIT – This is a totally upgraded embroidery kit based on the traditional cross-stitch kit, which is much more solid and simple to learn. The finished carpet can be an elegant decoration in your house Come enjoy much fun this DIY kit will bring to you!
Finishing Techniques

A finished rug needs at least an inch of unhooked canvas around every edge, or the whole piece frays apart the first time someone steps on it. I learned that the hard way on my second project, where I hooked straight to the border and watched the corners pull loose within a week.
The actual finishing is straightforward. Fold that empty canvas over twice toward the back, right up against where your hooked yarn begins, and whipstitch it down. The canvas feels stiff and almost brittle when you bend it, but it will not snap. At the corners, trim the excess so each flap forms a triangle, like wrapping a present, then fold and stitch the next flap over it. Flat corners matter more than pretty stitches; bumps underneath telegraph through and make the rug rock on hard floors.
If any raw canvas still shows, run a second line of whipstitching around the entire edge to hide it. Matching yarn helps, but near-matching works fine. The stitching sits on the underside and catches almost no light.
Recommended Products

Material: Polyester. Size: about 38x38cm.

PREMIUM GLASS FIBER: Made of premium glass fiber, this rug hooking supplies ensures durability and long-lasting performance. The robust material is deformation-proof, providing you with a dependable base for all your DIY rug projects. Whether you’re a beginner or an experienced crafter, the high-quality fibers will guarantee a smooth crafting experience

EASY TO FOLLOW INSTRUCTIONS: Our latch hook kits for adult beginners come with a pre-printed pattern on the canvas. With easy-to-understand instructions and color-coded guides, both beginners and children can effortlessly create beautiful designs.
Making Rugs Non-Slip

Finished latch hook rugs are slippery on hard flooring, which is the first thing you notice when you step out of bed onto one. The yarn sits on top of the canvas with nothing gripping the floor beneath it.
You have three ways to solve this, and stitching a non-slip rug pad to the back is the one that has kept my rugs in place long-term. The pads are made from a foam that breaks easily, so you need to work gently, keeping the stitches flat so the rug does not puff up in spots. You can hide the raw canvas with a whip stitch at the same time, which saves a step. It is cheap, but it takes time to do neatly.
Brushable rug backing is quicker. You work it into the weave with a stiff-bristled brush, apply thin even coats, and let each coat dry fully. It locks the yarn pieces in place too, which helps the rug last longer. It costs more, and it contains ammonia, so you need good ventilation while it dries.
Just tossing a pad underneath without stitching works in theory. In practice, the pad shifts or the rug bunches, especially with pets or daily traffic.
Recommended Products
Non-slip Protection: Our pad's signature grip keeps rugs securely in place, preventing bunching and sliding during daily use. It also protects your floors from wear and tear, including damage from high heels, children at play, and more.

Non-slip Protection: Our pad's signature grip keeps rugs securely in place, preventing bunching and sliding during daily use. It also protects your floors from wear and tear, including damage from high heels, children at play, and more.

Powerful Anti-Skid Protection: Featuring an over 30% thicker design (0.1" vs. standard 0.07" pads), BAGAIL rug pads provide stronger grip and cushioning to keep rugs securely in place. This helps prevent bunching in high-traffic areas, reducing trip hazards on hardwood floors and making homes safer for active kids and pets
Frequently Asked Questions
Recommended Products
Latch hook kit: this package contains 2 pieces of 38x38cm Round blank rug hooking mesh and 2 pieces latch hook tool, 4 pieces in total, which can satisfy your embroidering needs

Latch hook kit: this package contains 2 pieces of 50 x 100 cm/ 19 x 39 inches blank rug hooking mesh and 2 pieces latch hook tool, 4 pieces in total, which can satisfy your embroidering needs

Complete All-in-One Kit – Everything included: Pre-printed & sewn pillow cover, latch hook tool, soft colorful yarn, and step-by-step English instructions. No extra tools needed – perfect for beginners!
What can I do with my finished latch hook project?
Turn it into a rug, a throw pillow, a wall hanging, or frame it. Each option uses the same finished piece differently: a rug needs non-slip backing, a pillow needs a fabric backing and form, a wall hanging needs a clean edge and a hanger, and framing works best with a shadow box or deep mat so the glass does not crush the loops.
How do I make my latch hook rug non-slip?
Stitch a non-slip rug pad to the back for the cheapest long-term fix, though the foam tears easily so keep stitches flat. Brushable rug backing goes on faster and locks yarn in place, but costs more and needs ventilation while drying. A loose pad underneath shifts too easily to work well.
What supplies do I need to make a latch hook rug?
You need gridded latch hook rug canvas, a latch hook tool with a hinged metal arm, pre-cut yarn, a yarn needle, and rug backing. Gridded canvas keeps your pattern straight, and pre-cut yarn saves hours over cutting your own. Herrschners sells kits that bundle canvas, yarn, and pattern together.
Leave a Reply