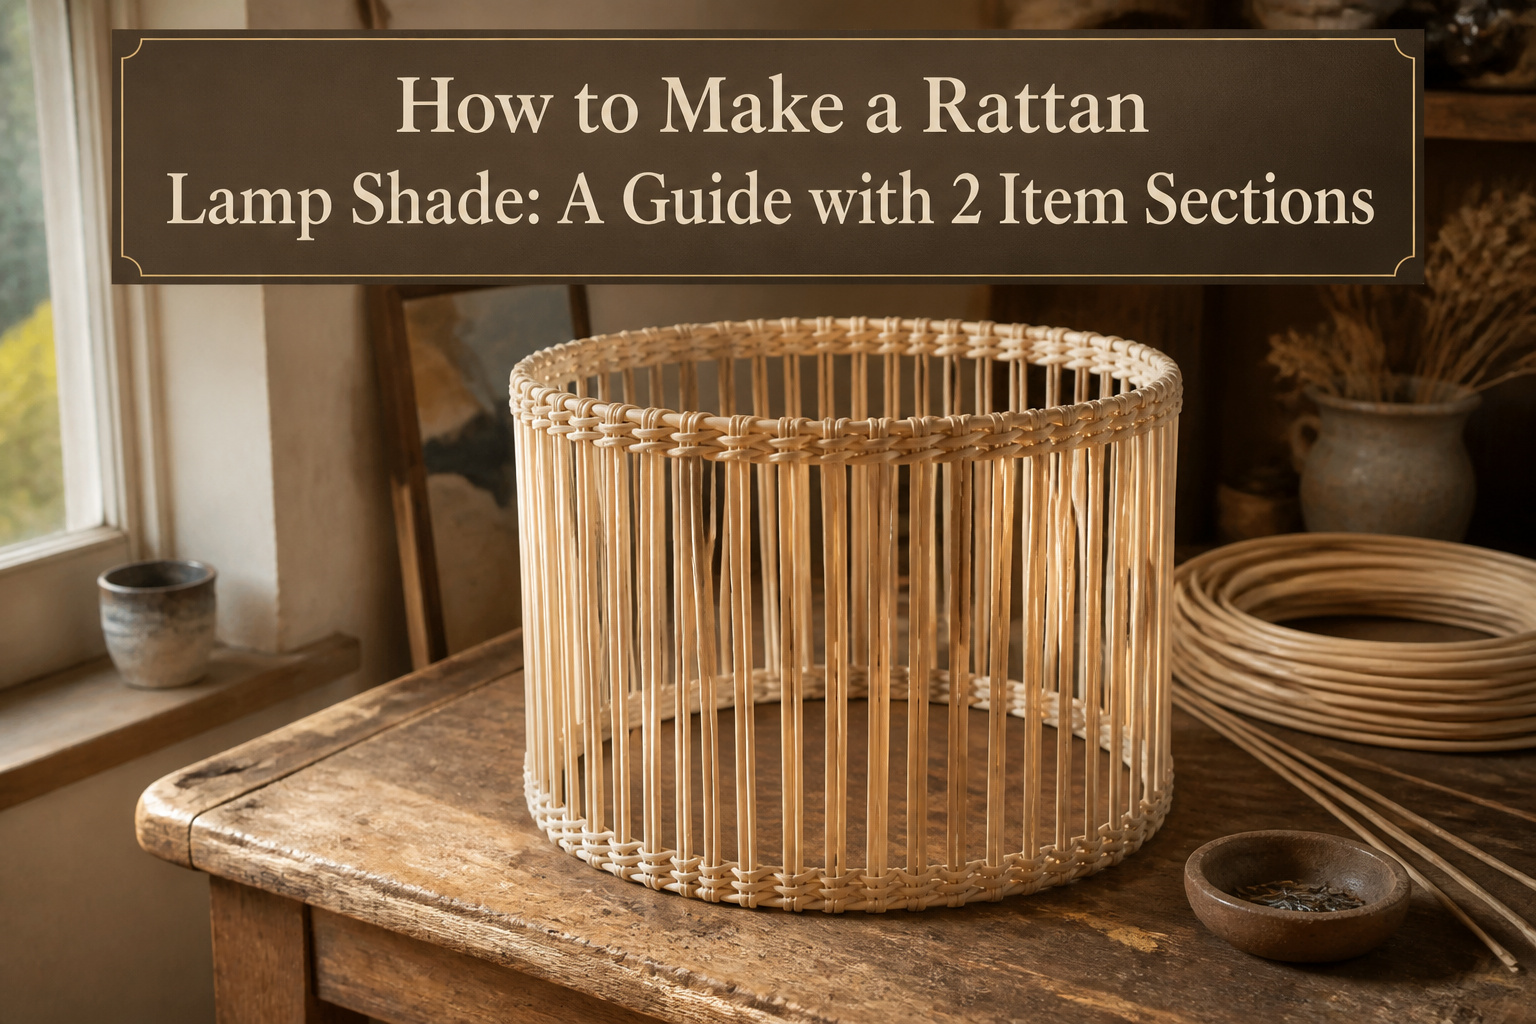
A finished rattan lamp shade takes four to six hours and about forty dollars in materials if you already own basic tools. Most builds fail at the flattening stage, where skipping the 24-hour weighted rest leaves the coil memory fighting every bend. The 20cm ringset that frames a small drum shade demands a 62.82cm rattan cut, plus two centimeters for the seam overlap that keeps the join from pinching.
1. Determine the Size

A 20cm ringset gives you a circumference of 62.82cm, which is the number that actually matters when you cut your rattan. I multiply diameter by Pi, then add a centimeter or two for the seam overlap; skimp there and the shade pinches at the join.
The depth is where you have to make a judgment call. My rattan came in a 65cm length by 21cm depth, sized for that same 20cm ring. Wider diameters can handle deeper shades without trouble, but rattan has only so much flexibility. Push it too deep on too small a ring and the weave fights the curve, or the seam bulges and needs extra support. I have seen 21cm work cleanly on 20cm rings; much deeper and I would start looking at a larger ringset or a stiffer material.
Recommended Products
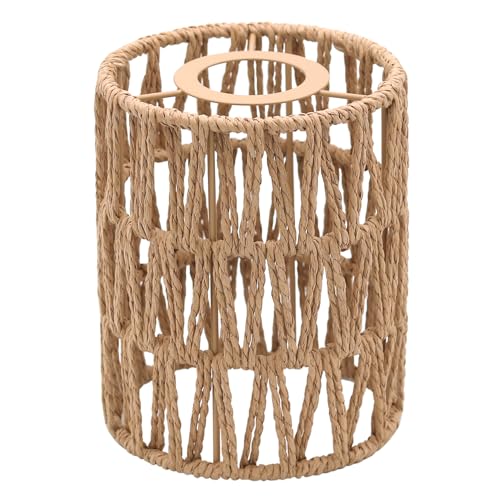
【Boho Rattan Lamp Shade】 The rattan lamp shade is made of purely-handcrafted lampshade and metal frame, natural and durable. When lighting, the small pendant lamp shade…
2. Prepare the Rattan

Rattan arrives coiled tight, and that curl will fight every bend you try to make. Lay it flat for at least 24 hours before you start, weighted down with a board and heavy books spread evenly. The strands will still hold some memory of the roll, but enough tension releases that you can work with them instead of against them.
After the flattening, a 10–15 minute soak in warm water is what separates a shade that holds its cylinder from one that cracks at the curve. The water penetrates the fibers and lets them bend without tearing, especially where the rattan stretches around the frame. Blot the excess moisture afterward and let the pieces rest flat again; wet rattan is pliable, but it needs that rest to settle into the shape you force on it. Skip either step and the shade ends up lopsided or split, and a split strand means starting that panel over.
Recommended Products

【 Polyethylene Material】Our wicker repair kit is crafted from polyethylene (PE) material, guaranteeing exceptional durability and long-lasting performance.

Size Information: Linen fabric patch tape measure 4×79 inch to meeting your different size needs, you can also choose to cut your own to the size you want. Hide the repair traces. Give your linen sofa a new look

This solid color linen tape is made of linen on the surface, with self-adhesive on the back, durable and environmentally friendly, not easy to tear, beautiful and practical, light and portable.
3. Cut and Edge the Rattan

Cutting the rattan to size means adding 2cm to the length you measured for the shade, then slicing at the edges of the squares to keep the weave from fraying. Any loose strands at the edges get trimmed clean before the tape goes on.
Self-adhesive textile tape runs 2cm longer than the rattan strip itself. Fold it in half lengthwise, peel one side, and press the rattan face-down onto the exposed half. Fold the remaining half over the back edge and trim the overhang flush at both ends. This same step repeats at the top and bottom of the shade, then once more on the short edge where the seam will sit, corners neatened with a quick trim.
The textile tape does two jobs: it gives the rings something solid to grip, and it blocks the rattan pattern from telegraphing through the finished binding. Over that tape, a strip of 9mm Tessa Double-sided tape runs along the front face at top and bottom. Peel the backing, add a thin line of fabric glue down the center for insurance, then lay the 25mm bias binding so its folded lower edge meets the bottom of the textile tape. Leave a 2cm overhang at the start, press the length down gently, and trim the excess flush at the untaped short edge. The bias binding finishes the raw edge; the double-sided tape underneath keeps it from lifting after months of handling.
Recommended Products

Boho Natural Rattan Lamp Shade: The Lamp Shade is made of hand-woven natural rattan and durable metal, which is Warm and Chic. The rattan lampshade blends seamlessly with trends such as vintage, nature, boho and hygge


【Natural Material】Crafted from durable iron and handwoven natural rattan, our rattan lamp shade is eco-friendly and built to last, offering a warm, boho-chic aesthetic that complements vintage, farmhouse, and modern decor styles.
4. Ready the Rings

The rings need to sit 2–3 mm back from the top and bottom edges of the shade, which sounds fussy until you roll the seam and realize that gap is what keeps the weave from fraying past the bias tape. I wrap both rings in 9mm Tessa double-sided tape, running it so the ring lands dead center between the tape edges, then pinch the tape around the metal so almost nothing shows. The utility ring with the fitting gets placed with its spoke turned away from the short seam edge; if it lands there, the shade rolls crooked and the bulb sits at an angle you will notice every evening. Lay the rattan right-side down, peel the backing, and set both rings onto the textile tape simultaneously. A pair of scissors braced against the ring stops the roll from getting ahead of you when you work toward the covered seam.
Recommended Products

Natural Handwoven Rattan: embrace a sustainable lifestyle with our natural handwoven rattan chandelier lamp shades; Crafted from rattan and a sturdy metal frame, these shades offer rust-resistant and fade-proof qualities for a touch in your indoor spaces. Please note: Made from natural rattan, slight color variations may occur between different batches

Natural Woven Craftsmanship: This rattan lamp shade is made of durable paper rope paired with rustproof metal frame. The wavy scalloped outline creates gentle natural texture, ideal to build warm boho home aesthetic.

Boho Natural Rattan Lamp Shade: The Lamp Shade is made of hand-woven natural rattan and durable metal, which is Warm and Chic. The rattan lampshade blends seamlessly with trends such as vintage, nature, boho and hygge
5. Roll and Secure the Shade

Rolling the rattan around the rings takes more patience than force. I lay the sheet face-down, position the taped rings about 2–3 mm from each edge, and roll toward the seam edge where the backing paper still covers the adhesive. Stopping roughly 10 cm short gives room to work; I keep scissors pressed against the ring so the roll doesn’t creep past where I want it. Peel the backing, add a thin glue line, and press the seam closed with a seam roller or the heel of your hand so the join lies flat. If the inside edge lifts, another line of glue underneath fixes it without bulk.
The bias tape finish is what separates a shade that reads handmade from one that reads homemade. I open the tape, pull the raw edge over each ring, and tuck it underneath so the adhesive catches. Pull too hard and the bias line distorts on the front; gentle pressure and small adjustments work better than one aggressive tug. The tape covers the ring completely and gives the top and bottom the clean edge that bare rattan can’t hold on its own.
Recommended Products

【Rattan Lampshade Size】This light fixture lamp shade is suitable for all types of lighting fixtures with E26 lamp sockets. Hanging lamp lampshade lightweight and portable, the mounting holes are 2.36" in diameter, 10.24" in length, and 6.7" in height. Just remove the old lampshade and fix ours to the harp of the lamp base. The rattan plug in pendant light shade and better decoration it brings to your space. Please check the lampshade size to ensure it fits your fixture.

Dimension – Outer Diameter of Lamp Shade Ring: 7.87"/20cm; Center Hole Dia: 7/16"/1.1cm; Thickness: 3mm / 0.12"; Please verify the size to ensure compatibility with your light fixtures before purchase

Natural Indonesian Rattan Material: made of 100% natural Indonesian rattan, this lampshade has a warm, organic texture with reliable handwoven strands; It's lightweight yet sturdy, showcasing the natural elegance of real rattan
6. Wire and Test

The socket kit I wired in was a standard E27, which is what most pendant hardware uses and what you’ll likely find at any hardware store. Black to black, white to white, green or bare to ground, then twist on the wire nuts until they’re tight enough that a tug doesn’t budge them. I checked the cord for fraying before I started, because a nick you miss now becomes a short you smell later.
For the bulb, 60W incandescent or 13W LED equivalent is the ceiling you want to stay under. LED runs cooler, which matters more than you might think. Rattan is dried plant fiber, not fireproof composite, and a bulb sitting too close will scorch it over time. Six to eight inches of clearance between the bulb surface and the rattan is the minimum that keeps the weave from browning or worse. I held the shade up to the light before I locked the ring in place, measuring that gap with a tape measure because eyeballing vertical distance around a bulb is harder than it looks.
Once everything was connected, I flipped the breaker back on and tested the switch. The light worked, nothing warmed up beyond normal operating temperature, and the shade hung level without the socket pulling sideways. If yours doesn’t sit straight, the wiring is probably twisted inside the canopy; loosen the nut, let the cord untwist naturally, and retighten.
Recommended Products

All Weather Plastic Rattan – This PE rattan material is corrosion resistant, strong and durable, can extend the rattan furniture's life for 2 years.

Materials and Tools

Most rattan lamp shade builds need only a handful of items, though the exact lineup shifts depending on whether you are weaving strands around a frame or stretching cane webbing over rings. For a woven drum or pendant, the core list runs something like this:
- Rattan reed or cane webbing: 2–3mm reed for weaving detail, 5mm for structural ribs, or a 15–20 inch roll of cane webbing if you are wrapping a pre-made form. Soak either in water before bending; dry rattan snaps instead of curves.
- Lampshade rings or embroidery hoops: A 20cm ringset works for small shades; 13–18 inch wood embroidery hoops match wider webbing rolls. Match the ring diameter to your webbing width so the edges overlap cleanly.
- Adhesive: Self-adhesive textile tape for initial positioning, a glue gun for tacking joints, and fabric glue such as Gutterman HT2 for the bias binding seam. Wood glue helps if you are joining wooden hoops or dowels.
- Bias binding: 25mm wide in a color that disappears against your rattan. This finishes the raw top and bottom edges and hides the ring glue line.
- Scissors, measuring tape, and weights: Sharp scissors cut reed cleanly; a measuring tape prevents the "close enough" gap that telegraphs through the weave. Tins of food or sewing weights hold webbing taut while glue sets.
I skip the inflatable ball and hand pump some tutorials suggest. They are useful for shaping a round pendant freehand, but a ringset or embroidery hoop gives a renter-grade shade far more structural forgiveness and costs less than the balloon kit.
Recommended Products

Rustic Elegance Appeal: Celebrate rustic elegance with our rattan lamp shades; made to bring a cozy, inviting feel to your space; the natural texture adds warmth and a grounding touch, great for creating a peaceful, welcoming ambiance

Natural and Beautiful Lamp Shades for Floor Lamps: The small rattan lamp shade is made of natural bamboo weaving, healthy material, very textured to touch, with natural and beautiful features, making your home more cozy and natural. Note: For beauty and coordination, please purchase according to the size of the bulb. Both E27 interfaces are available

【Reliable Materials】The package includes 2 farmhouse rattan lamp shades, enough for your daily use and replacement needs. These lampshades are meticulously handwoven using quality paper rope and a sturdy iron frame, nicely blending style with durability to serve you for a long time.
Weave Patterns and Light Effects

Open weave throws stripes of light across the wall like a late-afternoon porch, while closed weave softens the bulb into something you can look at without squinting. The difference is spacing, not technique. For an open mesh, I leave a finger’s gap between strips and weave over-under in simple rows. Tight wrap means sitting each strip flush against the last, spiraling until the frame disappears.
Even spacing matters more than pattern choice. A rattan strip that drifts even half an inch off its neighbor reads as a mistake from across the room. I mark ring positions with painter’s tape before I start, then check every fourth strip against the mark.
To finish, the last strip gets tucked inside the weave or glued and clamped until set. Trim the tail, sand any sharp end, and the edge looks intentional. The tucked end holds better on a pendant that gets bumped; glue alone can dry brittle.
Recommended Products

Reliable Quality: Made of premium woven lamp shade, with modern hollow out appearance, sturdy and long-lasting. Dimension: 115×150mm/4.52"×5.9"(W*H); Inner Diameter:…
Rattan, Wicker, and Bamboo

Rattan, wicker, and bamboo all show up in woven lighting, but they behave differently when you are the one doing the weaving. Rattan is a thin, pliable vine native to Southeast Asia; soak it in warm water for about fifteen minutes and it stretches without tearing. That flexibility makes it the safest choice for a first lamp shade, especially around curved frames. Wicker is not a material at all but a method, usually done with rattan, reed, or synthetic fibers. A "wicker" label on a lamp shade tells you how it looks, not what you are holding. Bamboo is the stiffest of the three. It works for geometric shades with flat panels or tight cylinders, but bending it around a ring takes patience and usually heat. For a weekend project with hand tools, rattan cane webbing is the only one that forgives beginner mistakes.
| Flexibility | Best for | Watch out for | |
|---|---|---|---|
| Rattan | High; softens in warm water | Curved frames, first projects | Needs drying time before wiring |
| Wicker (weave style) | Varies by fiber | Consistent, textured look | Check the actual fiber; synthetics melt near bulbs |
| Bamboo | Low; rigid and brittle | Flat panels, angular shapes | Requires heat bending; splits if forced |
I would skip bamboo unless you already own a heat gun and have patience for trial runs. The fifteen-minute soak that saves rattan does nothing for bamboo, and a split strip means starting over. Wicker weave patterns are beautiful, but buying pre-woven rattan matting and wrapping it to your frame gets you the same look with less grief.
7. Design Variations

Five approaches cover most of what you’ll find online, and they sort cleanly by how much structure you bring versus how much you build.
The drum shade with embroidery hoops is the gentlest entry point. Two wooden hoops form top and bottom rings, with rattan webbing stretched between them. The hoops do the geometry for you; the webbing just has to stay taut. Sources note this as the first method they’d hand a beginner, since a drum is forgiving if your tension drifts slightly.
A flower-shaped tiered design uses the same hoop vocabulary but stacks three or four rings of diminishing size, also in rattan webbing. The tiered silhouette reads more decorative than the plain drum, though the construction is nearly identical. Whether the extra visual noise earns its keep depends on the room; in a space already busy with pattern, the simpler drum usually wins.
For a round strand shade, an inflatable ball becomes your mold. You wrap rattan strands around it, let the adhesive set, then deflate and remove the ball. The resulting sphere is seamless and sculptural, but the method demands that you trust the process through the wet, saggy middle stage. The sources flag this as needing "more courage," which is fair; without the ball’s pressure from inside, the shape collapses until the glue cures.
The upcycled route starts with an existing shade frame, typically metal rings from a discarded fixture. Four-millimeter dowels stand vertically between the rings, spaced about one per centimeter of circumference, then wrapped with raffia at top and bottom to hide the glue. One builder spent roughly $40 total: under $30 for seven two-meter dowel lengths, plus a secondhand lamp base. The raffia, glue, and spray paint were already on hand. At retail, a comparable rattan-style lamp runs into the hundreds, so the trade is time for money and the satisfaction of not discarding a frame.
Finally, the wicker basket pendant conversion skips fabrication entirely. A rigid basket with good structure hangs from its own weave, though finding the right diameter and depth takes patience. Two failed attempts taught one maker that soft or shallow baskets hang unevenly; the basket needs enough body to stay true under its own weight. When it works, it is the fastest path from nothing to lit, and the texture is authentic rather than imitated.
Coloring and Upcycling Options

Natural pigments like turmeric, charcoal, or tea will shift rattan toward warm ochres, soft grays, or honeyed browns without hiding the weave. Chemical dyes work faster and reach deeper saturation if you want an ombré or a two-tone accent. Either way, the material drinks in color unevenly, so test the back side of a spare strip first and let it dry fully before judging.
Spray paint saves time on old lamp bases or basket frames you are converting. Krylon paint-plus-primer in khaki reads as a medium-light brown that flatters most rooms, and a single can covers base marks or dated finishes in two thin passes. Lightly sanding glossy surfaces first helps acrylic or spray paint grip; skip this and the finish flakes where hands touch most.
For a basket-to-shade conversion, raffia wrapped around dowel seams covers glue spots and adds texture. A secondhand lamp plus dowels and stain ran about $40 in one build; the raffia, glue, and spray paint were already on hand. That math only works if you already own the basics, but it beats retail prices for the look.
Cleaning and Maintenance

A rattan shade collects dust faster than fabric because the weave leaves gaps. Dry-dusting with a soft cloth or vacuum brush keeps the buildup from settling into the inner gaps. For deeper cleaning, a damp cloth with mild soap lifts grime off the strands, but soaking the rattan warps the weave and weakens the joints. I air-dry mine completely before screwing it back onto the fixture; any trapped moisture turns the natural fibers brittle over time. Spot-cleaning works best for small marks rather than washing the whole shade. With this routine, the lamp I made two years ago still holds its shape and color without any fraying.
Safety Rules for Rattan Lighting

Rattan looks airy, but the gaps between the weave trap heat the same way a closed shade does. The sources that rank for this project all land on the same non-negotiables, and after reading them, the 6–8 inch clearance between bulb and rattan is the number that stuck with me.
- Use a maximum 60W incandescent or 13W LED equivalent. Anything hotter, and the dried fiber becomes a tinder risk.
- Keep that 6–8 inch gap even if the shade hangs taller than it looks; the heat pool rises.
- Check that every wire, socket, and canopy carries a UL rating for pendant use, not just for "lamps" generally.
- Match colors when you connect: black to black, white to white, green or bare to ground. Wire nuts on every joint, and tug-test before you button anything up.
- Frayed cord anywhere in the run means stop and replace the piece, not tape it.
LEDs solve most of the heat problem outright, which is why the pro move is to skip incandescent entirely. If your existing fixture has cloth-wrapped vintage wiring, aluminum housing without a ground path, or any doubt about the rating, hire an electrician. The cost of a service call beats explaining smoke damage to a landlord.
Frequently Asked Questions
How do you make a rattan lamp shade?
You can build one by stretching rattan cane webbing or woven reed around lampshade rings or embroidery hoops, securing it with adhesive tape and bias binding, then wiring a pendant socket kit. The article walks through sizing the rattan with Pi, flattening and soaking the material so it bends without splitting, edging it with textile tape, rolling it onto taped rings, and finishing with bias binding.
What materials do I need to make a rattan lamp shade?
The core list is rattan reed or cane webbing, lampshade rings or embroidery hoops matched to your webbing width, self-adhesive textile tape, 9mm Tessa double-sided tape, fabric glue such as Gutterman HT2, 25mm bias binding, scissors, a measuring tape, and weights to hold material flat. A glue gun helps for tacking joints, and a pendant light cord kit with an E27 socket finishes the electrical side.
How do you install a rattan lamp shade?
Wire the socket black to black, white to white, and green or bare to ground, then twist on wire nuts until a tug does not budge them. Keep the bulb 6 to 8 inches from the rattan surface, use no more than a 60W incandescent or 13W LED equivalent, and check that all hardware carries a UL rating for pendant use. After wiring, restore power and test; if the shade hangs crooked, the cord is likely twisted inside the canopy.
Leave a Reply