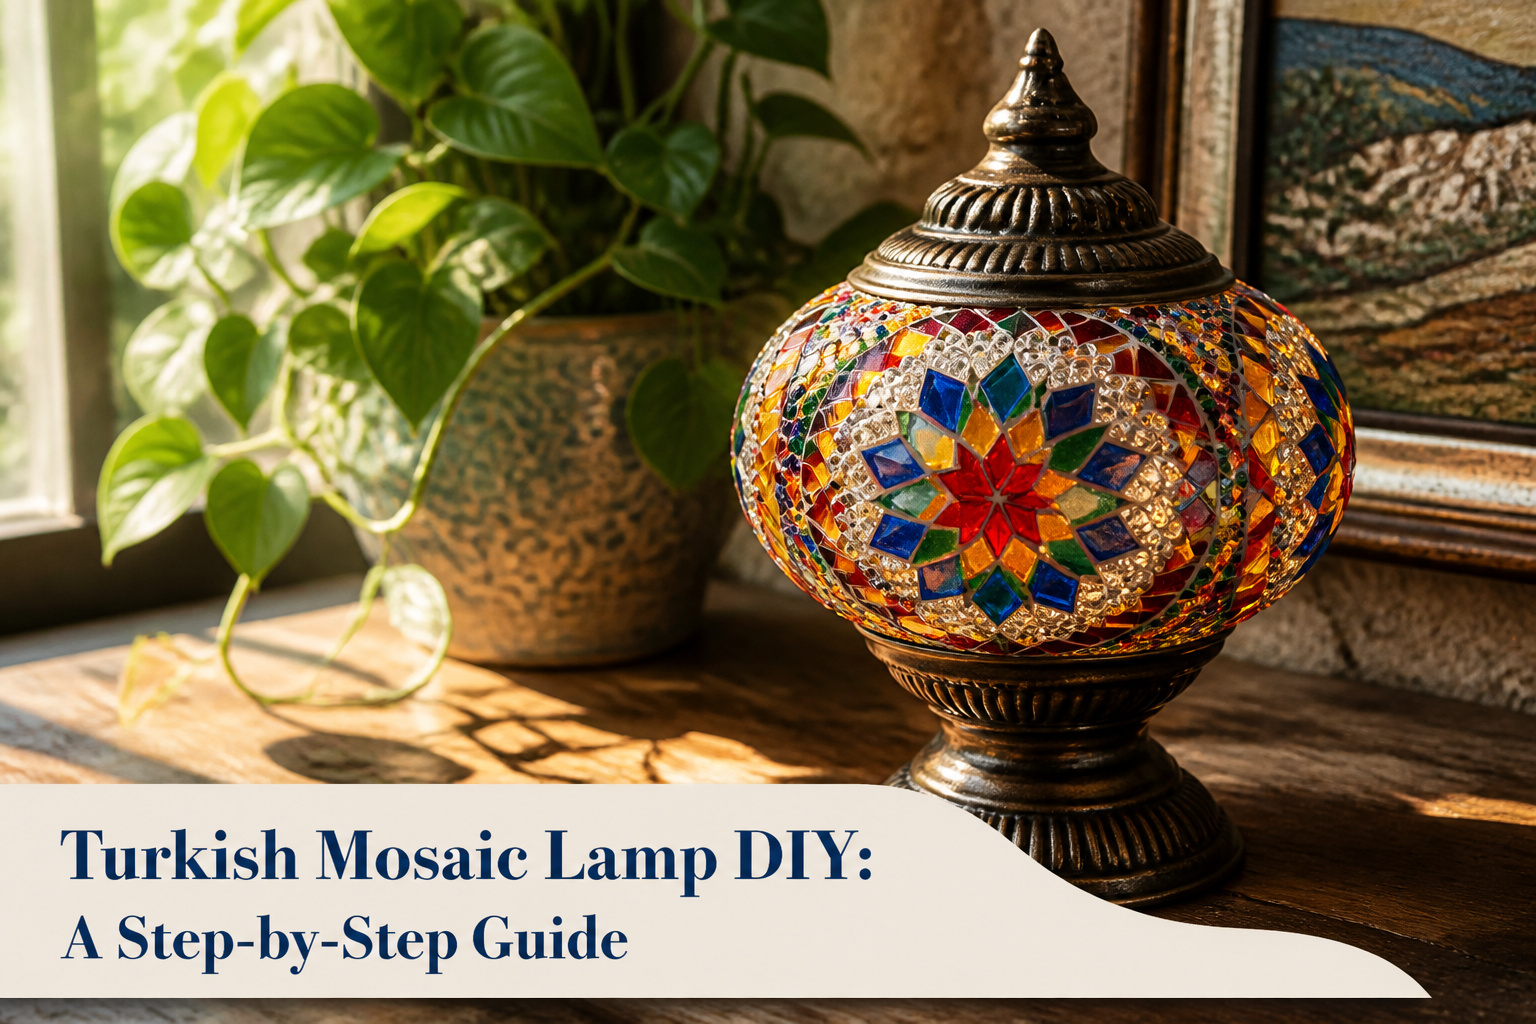
A Turkish mosaic lamp is a glass globe covered in hand-cut colored tiles and seed beads, lit from within by a candelabra bulb. The catch is that symmetry on a curved surface compounds every small error until the whole design lists crooked. Marking true center with a grease pencil before any glue touches the globe is what separates handmade from sloppy, and the 3.9 inch size leaves no room to hide a drift.
Designing the Pattern

A paper template saves hours of second-guessing once glue is involved. I traced the globe’s outline onto a sheet, then blocked in 2–3 main patterns and 2–4 smaller patterns that repeat around it. Traditional Turkish motifs lean on geometric stars, tulips, and arabesques, but for a first attempt I simplified: one large central medallion, two mid-size diamonds, and tiny corner fills that echo the diamond shape without demanding perfect symmetry. The repeat is what makes the lamp read as Turkish rather than random mosaic. Working on paper first also let me test color balance; I could see that my blue-heavy first draft would disappear against a navy wall, so I swapped two sections for amber and coral before touching any glass.
Recommended Products

【Design Your Own 3-Globe Mosaic Masterpiece】Create a striking 23-inch tall table lamp featuring three distinct Turkish-patterned glass globes—each a blank canvas for geometric or free-flowing designs. This DIY Turkish mosaic lamp kit transforms crafting into a collaborative ritual, allowing families, friends, or teams to create together. Ideal for those seeking a personalized decorative project, the finished piece reflects authentic Turkish artistry while celebrating collective creativity .

【Design Your Own 3-Globe Mosaic Masterpiece】Create a striking 23-inch tall table lamp featuring three distinct Turkish-patterned glass globes—each a blank canvas for geometric or free-flowing designs. This DIY Turkish mosaic lamp kit transforms crafting into a collaborative ritual, allowing families, friends, or teams to create together. Ideal for those seeking a personalized decorative project, the finished piece reflects authentic Turkish artistry while celebrating collective creativity .

**Craft Your Own Turkish Mosaic Lamp** — This complete DIY kit includes a glass globe, mosaic beads, glue, and tools to build a stunning beaded lamp that reflects your personal style
Preparing the Glass Globe

A 3.9" x 4.9" glass globe looks small enough to eyeball, but the center lines are what separate a lamp that reads handmade from one that reads sloppy. I learned that the hard way on my first globe, where the pattern drifted upward by nearly half an inch and the finished piece sat crooked on its base.
Now I mark horizontal and vertical centers before any glue touches glass. A grease pencil works better than a Sharpie here; it leaves a visible line that rubs away completely with a dry cloth once the mosaic is set. I draw the equator first, rotating the globe slowly against a ruler taped to the table, then find the vertical halfway point with a simple measuring tape wrapped around the circumference. The two lines cross at true center, and that crosshair becomes the anchor for every section of the pattern that follows.
Symmetry on a curved surface is unforgiving. The eye catches even a quarter-inch drift because the lamp is viewed from every angle once it hangs. Without those pencil guides, each tile placement compounds the last small error until the whole design lists like a sinking ship.
Recommended Products

Pre-cut Rhombuss – don't require any nipping

More than 15 Colors Mixed – Each shape of mosaic tiles includes no less 15 colors, provide great variety of color for your mosaics projects

4 shapes of mosaic – These mosaic tiles come with 4 shapes, Diamond+Triangle+ Square+Rectangle
Cutting the Glass

The colored glass needs to come out in strips about 8 1/2" by 2", the clear glass slightly narrower at 8 1/2" by 1 1/2". Both get cut into diamonds from there, but start with those rectangles or the proportions will drift. I used a standard oil-fed glass cutter and running pliers, nothing specialty, plus gloves and goggles because the shards do fly and the edges stay sharp longer than you expect.
My first few scores were too light, which I did not realize until I tried snapping by hand and cracked straight across the strip instead of along the line. Running pliers fixed that. They apply even pressure on either side of the score, so a piece I would have ruined with thumb pressure came apart clean. The pliers matter more than a fancy cutter; spend the money there if you are choosing.
Recommended Products

[Application]: Can be used to cut stained glass, mirror, tiles, mosaic and other craft and household uses. Notched brass teeth for snapping scored glass.

🔧【Light Weight Finger Stop Design】: Designed for comfort, durability, and performance. This glass cutter with a finger stop design prevents finger from slipping when griping. Would help users to cut with ease, and get a precise and clear score.

Ideal for high-speed cutting of glass
Gluing the Pieces
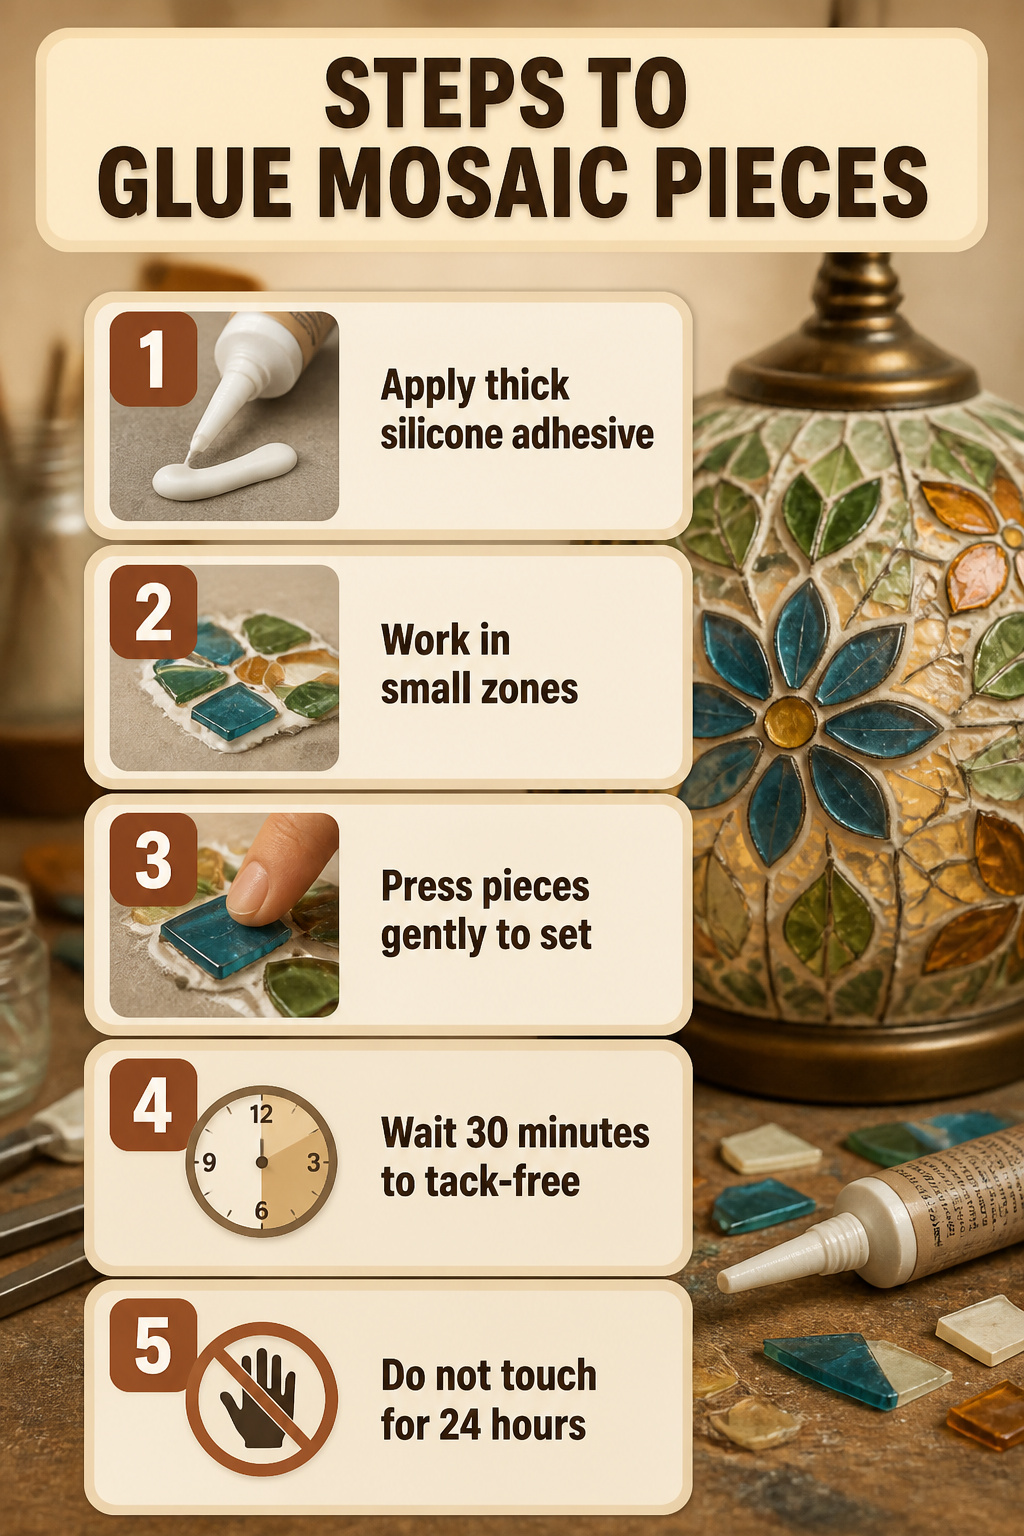
Silicone adhesive gives you two ways to work. A thick bead feels generous and forgiving, but on my first section the glass pieces slid downward before I could seat the next ones, and I spent ten minutes scraping and re-placing. A thinner layer, spread to the size of a single pattern at a time, holds the pieces where you press them without the sag.
The glue dries quickly enough that you have to work in small zones. Start from the center of your design and press each piece gently to set it. If excess squeezes over the top, leave it; once fully dry, it peels away clean.
The real cost of this step is time. The adhesive reaches a tack-free state in about 30 minutes, but you cannot touch or adjust the mosaic for 24 hours. That full day is the longest wait in the entire build, and it comes right when the lamp still looks half-finished. I set mine on a shelf where I would not bump it and walked away.
Recommended Products

🕯️ Set of Six Candle Covers: Replace your discolored, old, or missing covers with these high-quality candelabra candle covers, perfect for enhancing the look of your chandeliers and light fixtures.

2700K Soft Warm White Lighting: The right candelabra bulb can transform your home’s ambiance. Our chandelier bulbs emit a bright, natural 2700K soft white light with a 360-degree beam angle, offering comfortable illumination with a Color Rendering Index (CRI) of 90+. This high CRI ensures that all objects display their true colors, making them appear more vibrant. The bulbs are flicker-free and do not emit UV or IR radiation, effectively protecting your and your family's eyes

The product is 2PK ADJ Candy Socket
Adding the Beads
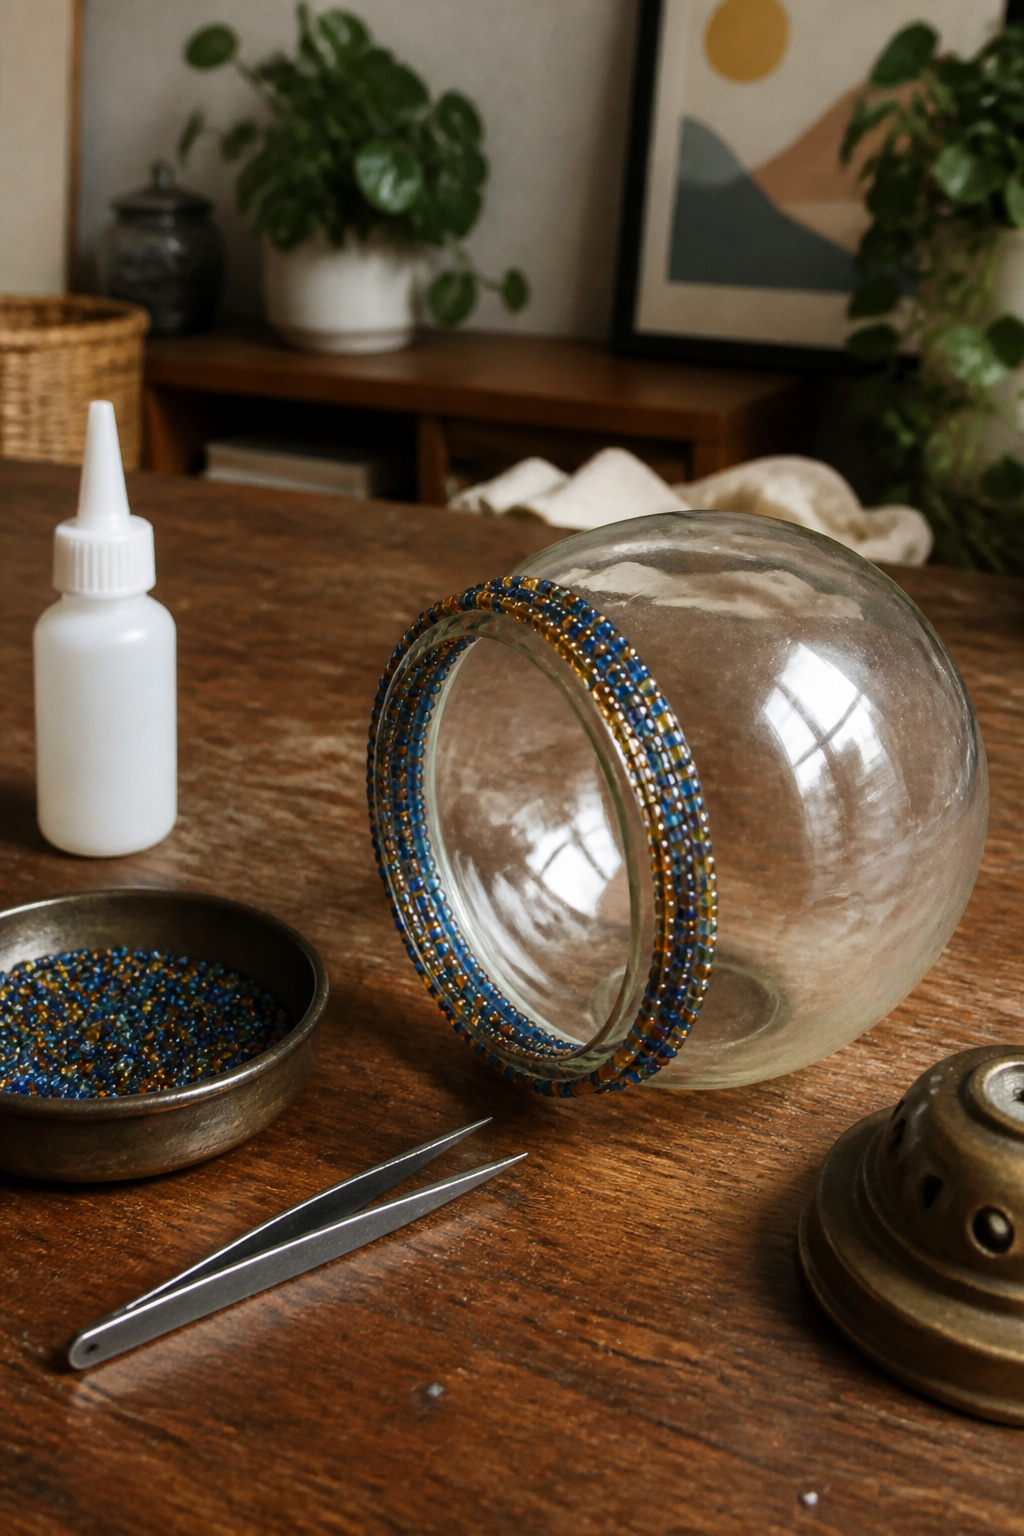
The raw edge where the glass cutter stopped is the first thing the eye finds if you leave it bare. Six ounces of 6/0 glass seed beads, pressed along every rim and border, bury that line completely and give the lamp the jeweled finish that makes the piece read as Turkish rather than homemade.
I started this step with my fingers and switched to tweezers within the first fifty beads. The beads roll, the glue skins fast, and a fingertip ends up wearing more adhesive than the globe does. Tweezers let you seat each bead against its neighbor with enough pressure to set it without sliding the whole row.
The work is slow. One full round of a medium globe took me the better part of an evening, and by the end my neck was stiff from the close focus. I found it helped to turn the lamp on its side so gravity worked with me, not against, keeping beads from pooling at the bottom while the glue set. The result is worth the tedium: the beads catch the same light as the mosaic tiles and turn the rim into a deliberate frame rather than a construction detail you failed to hide.
Recommended Products

Geometric Pattern Template: : You will receive a daily theme painting template with a size of 11.7×8.3 inches/29.7x21cm; Inspired by geometric patterns, this template combines patterns such as rectangles, quadrangles, triangles, and diamonds into a circular pattern, with each layer being different to make the pattern more flexible.

Package Comes with: you will receive 1 piece reusable painting stencil, which is A4 size 8.3 x 11.7 inches / 21 x 29.7 cm

You will get: the package comes with sufficient quantity of mandala reusable stencils, each one is about 12 x 12 inches, and approx. 0.25 mm/ 0.1 inch thick, suitable for home painting decoration
Grouting the Gaps

Grout has about 15 to 20 minutes of working time before it stiffens past the point of fixing, so mixing small batches beats one big bowl every time. I stir mine to a toothpaste consistency, something like 30ml water to a slow pour of powder, then spread it with a plastic stick or a gloved hand. The real move most tutorials skip is working the grout into the joints with a float or flat edge, pushing it down into gaps rather than skimming across the top. That first lamp, I just smeared and wiped, and the joints shrank back as it dried, leaving shadow lines that catch the light wrong.
After the grout sets for those 15 to 20 minutes, a damp sponge lifted most of the haze while it was still workable. I waited too long on one panel, and the film cured to a chalky skin that needed dry-cloth buffing later, plus a second pass with a barely-wet rag to get the bead surfaces clean. The sources that say "gently brush" are right, but they do not emphasize how fast the window closes. Too wet and you wash the grout out; too dry and you are polishing glass for an hour.
Recommended Products

【Create Your Unique Masterpiece】Unleash your creativity with BOHMR DIY Turkish Mosaic Lamp Kit, designed for crafting a personalized Moon table lamp that reflects your style. Inspired by ancient Turkish artistry, this kit empowers you to arrange vibrant glass pieces and beads into patterns ranging from geometric elegance to free-flowing designs, ensuring a one-of-a-kind decorative piece.

Handmade Mosaic Glass Globe with Decorative Metal Cap – This 7-inch diameter shade features a 6.3 cm (2.48 inch) mouth opening and includes a single antique brass-finish bottom cap with a customizable dangling charm (star, tulip, or leaf). While inspired by Turkish and Moroccan design, it’s also ideal for DIY lighting or replacing shades on various lamp bases. (Glass shade with cap only – no base or electrical parts included).

Make Your Own Turkish Lamp: No prior crafting experience is needed to create your own Bohemian-style masterpiece. The mosaic lamp kit includes pre-sanded, safe glass pieces, an easy-to-follow guide (Over 10 different Turkish patterns can be freely designed based on pictures), and all necessary tools (glue, gloves, etc.), making the intricate art form simple and enjoyable for everyone.
Sealing and Assembly

Grout needs three full days to cure before it meets any sealer. I learned that the hard way when I rushed a lamp last spring and watched the sealer bead up on damp grout like water on wax, leaving a patchy film that never bonded. Wait until the grout turns the lighter, chalky color that signals it is bone-dry inside, then brush on two thin coats of grout sealer with a foam applicator, letting the first coat go tacky before the second.
The 3.9 inch globe slips onto a standard candelabra base, the E12 size found on most accent lamps. Thread the socket through the top opening, seat the rubber grommet, and tighten the retaining ring finger-tight so the globe hangs centered. Wire the plug to the cord with a simple underwriter’s knot for strain relief, nothing fancier. Test the tilt before you call it finished; a lopsided globe usually means the grout layer is thicker on one side, and shimming the base with a felt pad fixes it without reopening the lamp.
Recommended Products

4 shapes mixed in each package – These mosaic pieces come with Square, Rectangle, Diamond and Triangle. Having all these precut beautiful shapes will not only save you a tremendous amount of time, but will also inspire you when trying to create new designs


Assorted 4 Shapes in One Package – Diamond+Triangle+Square+Rectangle mixed in one package
Materials and Tools

A 3.9" x 4.9" clear glass globe forms the base. Colored stained glass needs to measure 8 1/2" x 2", and clear glass 8 1/2" x 1 1/2" — old picture-frame glass works if it matches the 1/8" thickness of the colored pieces. You’ll cut roughly 50 colored diamonds and 42 clear ones from those sheets.
About 6 oz of 6/0 glass seed beads line the top and bottom rims for a clean edge. Grout fills the gaps after the tiles are set, and silicone adhesive bonds everything to the globe. Safety gloves and goggles are non-negotiable; glass shards fly, and the edges stay sharp long after cutting. A glass cutter scores the lines, running pliers snap them clean. No brands came up consistently enough to matter, so this is a bring-what-you-have project.
Recommended Products

UPGRADED CUTTER HEAD: Are you worried about unsmooth glass cutting? Now our product can crack this problem as a whole, Premium Carbide glass cutter, sharp and smoother cutting. Absolute precision guaranteed cutting to guarantee smooth operation.
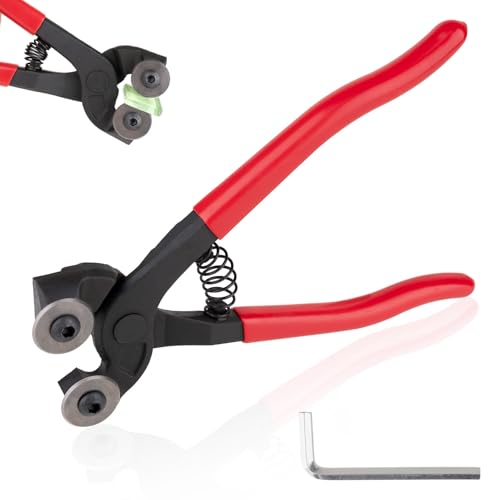
Product Features: This 7-inch wheeled glass cutter features a pair of hard-cutting wheels that are fit for cutting glass ranging from 1/16" (2mm) to 1/2" (14mm) thick. Its heavy-duty spring mechanism makes working with mosaic tiles easier

Upgraded Glass Cutter; Are you worried about unsmooth glass cutting? Now our product can crack this problem as a whole, package include of premium carbide glass cutter and premium glass cutter oil, sharp and smoother cutting. Absolute precision guaranteed cutting to guarantee smooth operation.
Safety Precautions

Working with glass and grout means two kinds of damage that show up after you think you are done. Grout dries skin worse than cement, and the dryness lingers for days if you skip the gloves. I learned that the hard way after my first mosaic project, when my fingertips cracked the next morning. The kit gloves are thin but adequate; the mistake is assuming you can wash off the residue fast enough. You cannot.
The 12-hour glue drying window is not just patience, it is a safety buffer. Rushing toward the next irritant, wet grout against half-set adhesive, means both layers fail and you are scraping and re-gluing with raw hands. Use that time to clear the floor. Glass shards travel. I have pulled slivers from my shoe soles hours after sweeping, because the pieces bounce and hide in grout texture and carpet pile. Safety glasses are non-negotiable while cutting; the diamond shapes snap unpredictably, and a fragment to the eye ends the weekend project in an emergency room. A mask matters less for the glass itself than for the grout powder, which kicks up fine enough to irritate lungs while you mix to that toothpaste consistency.
Recommended Products

🕯️ Set of Six Candle Covers: Replace your discolored, old, or missing covers with these high-quality candelabra candle covers, perfect for enhancing the look of your chandeliers and light fixtures.

🕯 REALISTIC DRIP EFFECT: These 4-inch tall fibre drip candle covers mimic the look of real melted wax, adding a touch of elegance and authenticity to your chandeliers and light fixtures.

Ceramic Body.The bulb light E-12 sockets are ceramic.It has higher heat resistant rate up to 200deg,work with both LED and incandescent candelabra bulbs
Drying and Curing Times

Silicone adhesive goes tack-free in about 30 minutes, but that is not permission to touch anything. I learned to treat that half-hour as the point of no return: nudge a tile now and it drifts, and the whole pattern unravels. The real wait is a full day before grouting, and even that is tight. One kit I followed lists 12 hours minimum for the glue to dry, which sounds workable for a Saturday morning start. It is not, not really, because environmental factors in the room, humidity especially, stretch that number without warning.
Grout itself gives you a more honest window: 15 to 20 minutes of working time once mixed, then a few days of curing before you can seal. I planned a neat weekend, glue Saturday, grout Sunday, seal Monday evening. The lamp sat on my kitchen table through Wednesday. The silicone was still soft in the joints I had pressed too thick, and the grout dried pale where I had rushed the wipe-down. Four days is the honest timeline for a first attempt, and anything less is a bet against the material.
Recommended Products


FLOOR TILE STENCIL SET: Decorate your space in a beautiful Morroocan style with mosaic tile stencils! This set includes four different patterns: choose one or mix them all together for a truly unique, custom look.
FLOOR TILE STENCIL SET: Decorate your space in a beautiful Morroocan style with mosaic tile stencils! This set includes four different patterns: choose one or mix them all together for a truly unique, custom look.
Design Inspiration

Traditional Turkish mosaic work draws from Ottoman mosque lamps, where deep blues and warm ambers dominate against geometric stars and repeating medallions. I spent an evening scrolling through images of those originals before settling on a simpler palette: two main colors and one accent, rather than the five or six I’d first imagined. The sources all confirm that any design you choose is valid, which matters because the cutting stage forces hard choices. Those mosque patterns rely on tiny diamonds and interlocking shapes; at 3.9 inches across, my globe couldn’t carry that density without looking crowded. I dropped the central medallion idea and kept a banded pattern instead, with larger diamonds that read clearly when lit. The orange glass I found caught the same amber tone as the Istanbul candle holders I’d seen, and pairing it with a cobalt blue gave the contrast those traditional pieces depend on. What survived from the Ottoman reference was the color relationship, not the geometry. That feels like the honest path for a first attempt: borrow the atmosphere, simplify the structure, and let the grout lines carry some of the detail your fingers can’t yet cut.
Frequently Asked Questions
What materials do I need for a Turkish mosaic lamp?
You need a 3.9" x 4.9" clear glass globe, colored stained glass cut to 8 1/2" x 2", clear glass at 8 1/2" x 1 1/2", about 6 oz of 6/0 glass seed beads, grout, silicone adhesive, safety gloves and goggles, a glass cutter, and running pliers. Old picture-frame glass works for the clear pieces if it matches the 1/8" thickness of the colored glass.
How long does it take to make a Turkish mosaic lamp?
Plan for four days on a first attempt. Silicone adhesive goes tack-free in 30 minutes but needs a full day before grouting, grout requires 15 to 20 minutes of working time once mixed, then several days to cure before sealing. Rushing any of these stages risks tiles drifting, weak joints, or sealer beading up on damp grout.
Can I customize my Turkish mosaic lamp design?
Yes, any design you choose is valid. Traditional Turkish patterns draw from geometric stars, tulips, and arabesques in deep blues and warm ambers, but a 3.9" globe forces practical limits. Most first-timers simplify to a few repeating motifs and two main colors plus one accent, letting the color relationship evoke the traditional atmosphere without crowding the small surface.
Leave a Reply